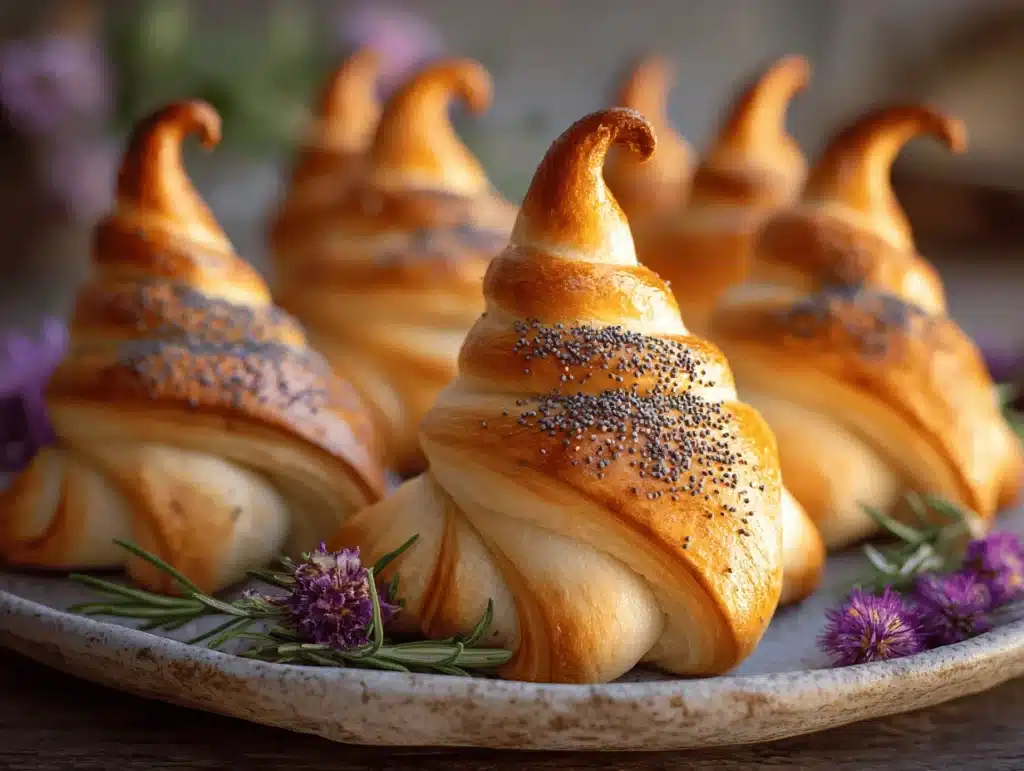
The moment I pulled my first batch of Witch Hat Crescent Rolls out of the oven, the kitchen filled with the smell of buttery dough and melted chocolate—it instantly felt like fall had arrived. If you’ve ever wished for a treat that looks magical but tastes like pure comfort, you’re in for a real treat with these Witch Hat Crescent Rolls. Honestly, these are the kind of festive snacks that make the whole family gather around, waiting for that first warm bite.
I first made these Witch Hat Crescent Rolls on a rainy October evening, determined to whip up something playful for a Halloween movie night. My kids had been begging for something “spooky but yummy,” and, let’s face it, I wanted something simple that didn’t require hours in the kitchen. I’ve tested dozens of crescent roll recipes over the years, but this one stands out for both its whimsical shape and melt-in-your-mouth flavor. You don’t need to be a pastry chef—if you can roll up dough triangles, you’re golden!
What I love most about these Witch Hat Crescent Rolls is how they bring together easy ingredients, a dash of creativity, and (best of all) that unmistakable cozy feeling you get from freshly baked bread. Whether you’re hosting a fall party, looking for a classroom snack, or just want to spice up a chilly afternoon, these treats hit the spot. As an experienced home baker, I can say with confidence: this recipe is reliable, kid-approved, and always a hit at gatherings. So get ready to roll, shape, and bake—because Witch Hat Crescent Rolls are about to become your new go-to for autumn comfort food!
Why You’ll Love This Recipe
If you’re searching for a festive fall treat that’s both eye-catching and easy to make, Witch Hat Crescent Rolls are your answer. After testing this recipe with my family (and getting rave reviews from my picky niece!), I’m convinced it’s a must-have for any autumn celebration. Here’s what makes these rolls irresistible:
- Quick & Easy: You’ll have these Witch Hat Crescent Rolls ready in under 30 minutes—perfect for busy evenings or last-minute get-togethers.
- Simple Ingredients: No need to hunt down specialty items; everything is available at your local store (you probably have most of it already).
- Perfect for Parties: These crescent rolls are ideal for Halloween parties, school events, or cozy family dinners. They look festive on a platter and instantly spark conversation.
- Crowd-Pleaser: Kids love the playful shape, adults love the flaky texture, and everyone comes back for seconds.
- Unbelievably Delicious: The combination of soft crescent dough and sweet fillings (chocolate, marshmallow, or jam—take your pick!) creates a melt-in-your-mouth experience.
Unlike ordinary crescent rolls, these are shaped into whimsical witch hats—just a little twist and pinch transforms the dough into something magical. I use a quick “pinch and bend” technique that’s practically foolproof. Plus, you can customize the filling to suit your crowd (Nutella is my personal favorite, but peanut butter or pumpkin spice are also amazing).
Honestly, nothing beats seeing the smiles when someone bites into a Witch Hat Crescent Roll for the first time. It’s the kind of comfort food that brings people together—simple, delicious, and packed with cozy fall flavor. If you want a treat that stands out from the usual party snacks (and doesn’t cause a kitchen meltdown), this recipe is your golden ticket.
Ingredients Needed
The beauty of Witch Hat Crescent Rolls lies in their simplicity. Every ingredient serves a purpose, from creating that signature flaky shell to adding a sweet surprise inside. Here’s what you’ll need to whip up a batch of festive, delicious rolls:
- For the Crescent Dough:
- 1 can (8 oz / 226g) refrigerated crescent roll dough (Pillsbury or store brand works great)
- For the Filling (choose your favorite or mix and match):
- 2 oz (56g) semi-sweet chocolate chips (classic, melts perfectly)
- 2 oz (56g) mini marshmallows (for a gooey, fun surprise)
- 2 oz (56g) creamy peanut butter (smooth texture, kid-friendly)
- 2 oz (56g) fruit jam or preserves (raspberry or apricot are my go-tos)
- 2 oz (56g) pumpkin butter or pumpkin puree (for that fall spice flavor)
- For the Topping:
- 1 tbsp (14g) unsalted butter, melted (for brushing)
- 1 tbsp (12g) granulated sugar (adds sparkle)
- 1/2 tsp ground cinnamon (optional, but adds warmth)
- For Decoration (optional, but fun):
- Colored icing (black and orange for authentic witch hats)
- Sprinkles or edible glitter (for a magical touch)
I always recommend Pillsbury crescent dough for the fluffiest result, but any brand will do in a pinch. If you’re looking to make these Witch Hat Crescent Rolls gluten-free, swap in your favorite gluten-free crescent dough (I’ve had decent luck with Immaculate Baking’s version). Feel free to get creative with fillings—even leftover Halloween candy works! If dairy is a concern, use plant-based butter and chocolate chips (Enjoy Life is a great brand).
Pro tip: If you want to make these ahead, prep the fillings and keep them chilled until you’re ready to assemble. The versatility here makes Witch Hat Crescent Rolls perfect for experimenting—no two batches ever have to be the same!
Equipment Needed
Making Witch Hat Crescent Rolls doesn’t require fancy gear (thank goodness). Here’s my tried-and-true list of kitchen tools:
- Baking Sheet: Standard size works; line with parchment for easy cleanup.
- Parchment Paper: Prevents sticking and helps rolls keep their shape.
- Small Bowl: For melting butter or mixing cinnamon sugar.
- Pastry Brush: For brushing melted butter (a spoon works if you’re in a pinch).
- Butter Knife or Spoon: For spreading fillings.
- Cooling Rack: Optional, but helps keep the bottoms crisp.
If you don’t own a pastry brush, a clean finger or spoon works for buttering. I’ve used silicone baking mats instead of parchment—they’re reusable and budget-friendly. For decoration, zip-top bags snipped at the corner make a great icing tool. Pro tip: Keep your baking sheet in good shape by hand-washing (avoid harsh scouring pads). If you’re making big batches, use two sheets and rotate halfway for even browning.
Honestly, I love recipes that don’t demand specialty gadgets. Witch Hat Crescent Rolls are fun for kids to help with, too—just make sure little hands are careful when shaping the hats!
Preparation Method
Ready to bake up some magic? Here’s my step-by-step guide to creating Witch Hat Crescent Rolls that look whimsical and taste incredible. (Trust me, the process is as fun as the result!)
- Preheat the oven: Set your oven to 375°F (190°C). Line a baking sheet with parchment paper for easy cleanup.
- Prepare the dough: Open the can of crescent rolls and unroll the dough. Separate into 8 triangles along the perforations. If the dough tears, just pinch it back together—no worries!
- Add the filling: Place a small spoonful (about 1/2 tbsp / 7g) of your chosen filling at the wide end of each triangle. Don’t overfill, or they might leak during baking.
- Shape the witch hats: Roll up each triangle loosely, starting from the wide end. Once rolled, gently pinch the narrow tip and bend it into a curved “witch hat” point. Sometimes I have to reshape the tip a bit—imperfection is part of the charm!
- Arrange on baking sheet: Place each roll onto the parchment-lined sheet, spaced about 2 inches (5cm) apart. Make sure the “hat” points are angled and visible.
- Brush with butter: Melt the butter and brush it lightly over the tops of each roll. This helps them brown beautifully and adds flavor.
- Add cinnamon sugar: Mix the sugar and cinnamon (if using) in a small bowl. Sprinkle over the buttered rolls for a sweet, sparkly finish.
- Bake: Pop the sheet in the oven and bake for 10-12 minutes, or until the rolls are golden brown and the “hats” look crisp. (Your kitchen will smell amazing.)
- Cool and decorate: Transfer rolls to a cooling rack for 5 minutes. If decorating, drizzle with colored icing or add sprinkles while still slightly warm so they stick.
- Serve: Serve warm for best flavor, but honestly—they’re delicious at room temp, too.
Troubleshooting tip: If the hats lose their shape during baking, you can gently reshape the points while they’re still hot. If filling leaks, just scrape the edges with a knife—no one will mind. I’ve found that working fast with cold dough helps the hats hold their shape best.
Don’t stress the details—the whimsical look is part of the fun! I usually let my kids choose their own fillings and help bend the hats. Baking together makes the experience even more magical.
Cooking Tips & Techniques
Let’s be honest: crescent roll dough can be a little unpredictable. Over dozens of batches (and a few funny fails), I’ve picked up some tricks for perfect Witch Hat Crescent Rolls every time.
- Keep the dough cold: Chill your crescent dough until right before shaping. Warm dough gets sticky and won’t hold the hat shape as well.
- Don’t overfill: A tiny bit of filling goes a long way. Too much and it’ll ooze out—learned that the hard way!
- Pinch & bend: When you shape the hats, pinch the tip firmly and bend it with a gentle curve. Some hats flop over, but that’s part of their witchy charm.
- Rotate the pan: For even browning, rotate your baking sheet halfway through. This is especially helpful if your oven has hot spots.
- Decorate while warm: Icing and sprinkles stick best when the rolls are still a little warm from the oven. Wait too long and decorations may slide off.
If you’re multitasking, prep the fillings and sugar topping ahead. I sometimes let the kids help with rolling and shaping—their hats always turn out more playful than mine! One baking fail taught me not to use too much jam (sticky mess, but still tasty).
For consistent results, use a digital oven thermometer to check your oven temp. Crescent dough is forgiving, but a few degrees off can change the texture. If you want crispier hats, bake a minute longer and cool on a rack. Trust me, Witch Hat Crescent Rolls are easy to master once you’ve made them a couple times!
Variations & Adaptations
Witch Hat Crescent Rolls are super versatile—perfect for customizing to suit your tastes or dietary needs. Here are my favorite ways to switch things up:
- Gluten-Free Version: Use gluten-free crescent dough and your favorite fillings. I tried this for my neighbor with celiac, and it worked beautifully.
- Seasonal Flavors: Add pumpkin spice or apple butter to the filling for a truly autumnal twist. I love swapping in cranberry jam for a Thanksgiving snack.
- Savory Hats: Skip the sweet fillings and use shredded cheese and a pinch of herbs for savory “witch hats”—great for dinner parties!
- Vegan Adaptation: Sub in plant-based crescent dough, vegan butter, and dairy-free chocolate chips. Tastes just as magical!
- Nut-Free Option: Use marshmallows, jam, or pumpkin puree if you’re avoiding nuts. I’ve made these for school events and no one missed the peanut butter.
Honestly, my favorite spin is a s’mores version—chocolate chips and mini marshmallows together. The hats puff up and ooze out gooey chocolate, and my kids lose their minds over them.
Don’t be afraid to experiment! Witch Hat Crescent Rolls are forgiving and fun. If you want to go bold, drizzle colored icing in zig-zags or add edible glitter. The only limit is your imagination (and maybe your fridge space).
Serving & Storage Suggestions
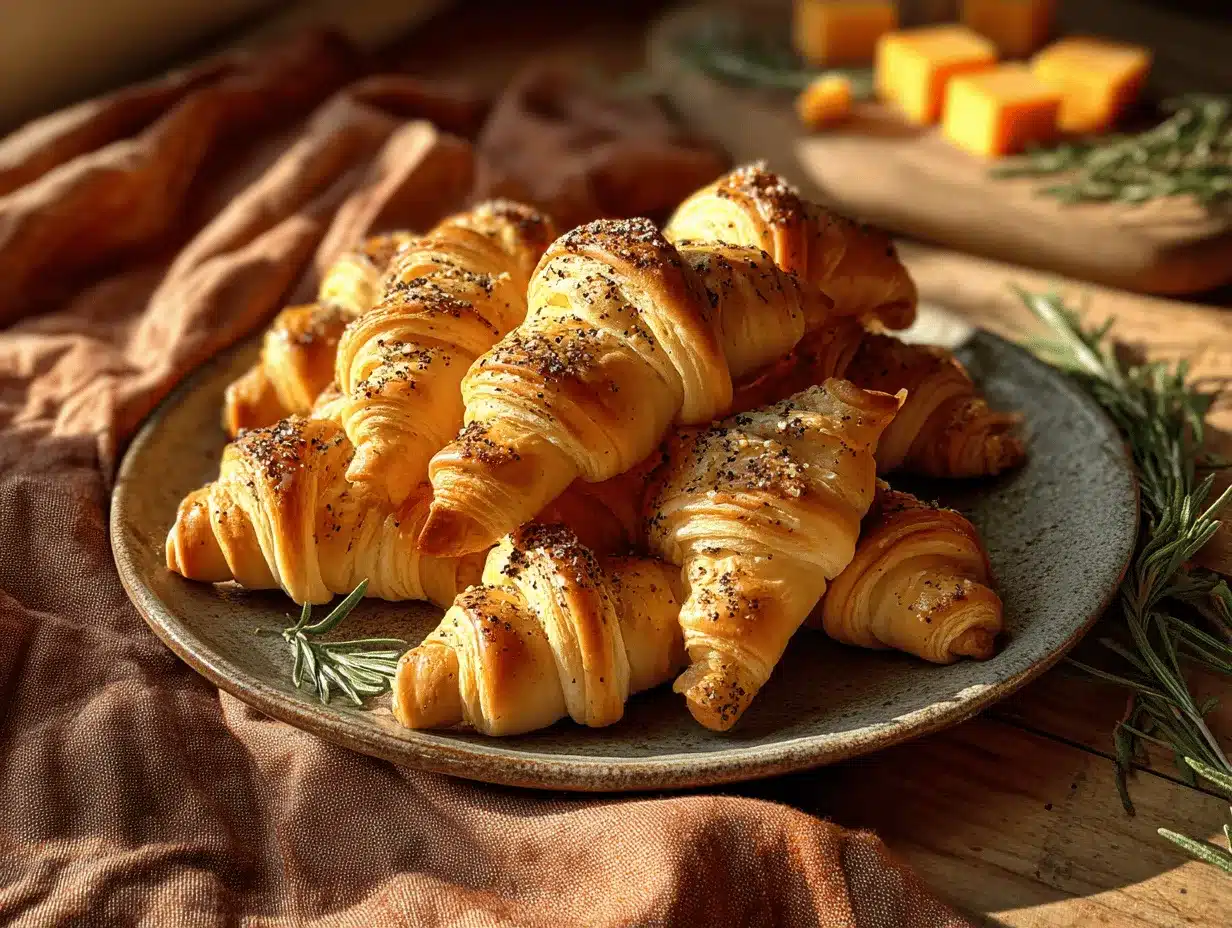
Witch Hat Crescent Rolls shine when served warm, straight from the oven. I love presenting them on a rustic wooden board sprinkled with extra cinnamon sugar—seriously, they look Pinterest-perfect!
- Serving Temperature: Warm is best, but room temp works for parties. If reheating, pop them in a 300°F (150°C) oven for 3-4 minutes—never microwave, or they get soggy.
- Presentation: Arrange on a festive platter with colored napkins. Pair with hot cocoa, apple cider, or pumpkin spice lattes for a cozy vibe.
- Complementary Dishes: Serve alongside savory snacks (like cheese balls or veggie trays) for balance. These rolls also pair well with fresh fruit for brunch.
- Storage: Store leftovers in an airtight container at room temperature for up to 2 days. For longer storage, freeze the rolls (wrap individually in foil); thaw and reheat in the oven for best flavor.
- Flavor Development: The cinnamon sugar topping gets more fragrant overnight, and the fillings stay soft. Honestly, I’ve snacked on leftovers for breakfast and they’re still delicious.
If you’re prepping for a party, make the rolls ahead and reheat just before serving. They hold up well, and the witchy shape stays intact.
Nutritional Information & Benefits
Each Witch Hat Crescent Roll (with chocolate filling) contains about 170 calories, 7g fat, 24g carbs, and 2g protein. (Numbers vary with filling choices.)
Crescent dough is a source of quick energy, and fillings like chocolate or peanut butter add a little protein. If you opt for fruit preserves or pumpkin puree, you get natural fiber and vitamins—bonus points for sneaking in extra nutrition!
For gluten-free or vegan diets, just swap the dough and fillings. These rolls do contain wheat and dairy (unless adapted), so be mindful of allergies. From a wellness perspective, I see these as a fun, portion-controlled way to enjoy festive treats—no need to feel guilty about indulging!
My kids love them because they’re sweet, my husband grabs them for breakfast, and I love how easy it is to adjust the recipe for different needs.
Conclusion
Witch Hat Crescent Rolls are more than just a snack—they’re a celebration of fall, fun, and family. They’re easy to make, endlessly customizable, and always a hit. Whether you’re baking for a party or a quiet night in, these rolls promise to deliver comfort and a little bit of magic.
Feel free to mix up the fillings, try new toppings, or let your kids get creative with decorations. That’s the beauty of this recipe—it’s a blank canvas for your autumn imagination. I keep coming back to it because it never fails to bring smiles (and delicious smells) to our home. Honestly, I hope it becomes part of your fall traditions, too.
If you try these Witch Hat Crescent Rolls, leave a comment below with your favorite filling or decorating idea! Share with friends, pin for later, and tag me on social media if you create your own spooky twist. Happy baking, and may your fall be filled with warmth and whimsy.
Frequently Asked Questions
Can I make Witch Hat Crescent Rolls ahead of time?
Absolutely! You can assemble them up to a day ahead, store in the fridge, and bake just before serving. They taste best fresh, but reheating in the oven works great.
What’s the best filling for Witch Hat Crescent Rolls?
Chocolate chips are classic, but marshmallows, jam, or pumpkin butter are delicious too. Mix and match to suit your crowd!
Can I freeze Witch Hat Crescent Rolls?
Yes! Freeze baked rolls individually. Thaw and reheat in the oven for 3-4 minutes at 300°F (150°C). The texture stays flaky and the filling soft.
Are Witch Hat Crescent Rolls safe for nut allergies?
Skip the peanut butter filling and use marshmallows, jam, or pumpkin puree. Always check ingredient labels on dough and toppings for allergens.
How do I get the “witch hat” shape just right?
After rolling, pinch the tip of the triangle and bend it into a curve. It doesn’t have to be perfect—each hat looks unique, and that’s half the fun!
Pin This Recipe!
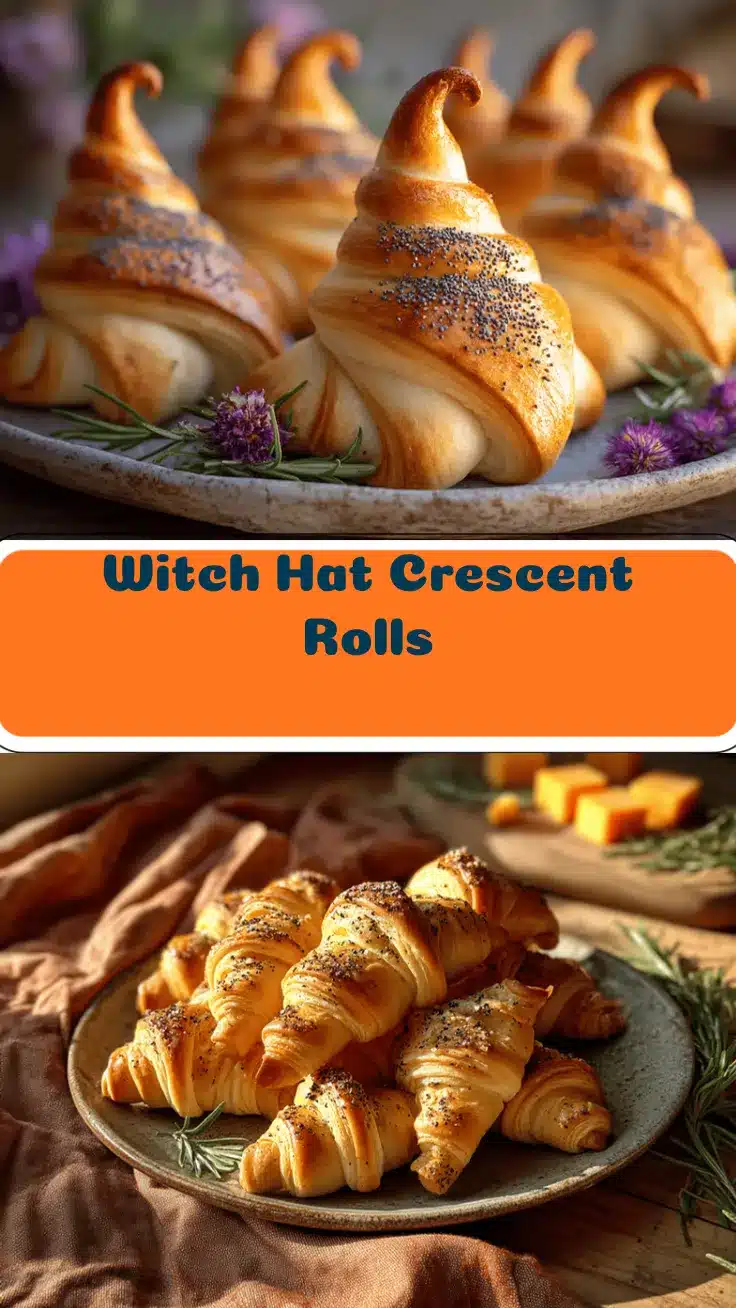

Witch Hat Crescent Rolls: Easy Festive Fall Treats for Parties
- Total Time: 22 minutes
- Yield: 8 rolls 1x
Description
Witch Hat Crescent Rolls are whimsical, buttery crescent rolls filled with your choice of sweet or savory fillings, shaped into playful witch hats. Perfect for Halloween parties, fall gatherings, or cozy family nights, these treats are quick to make and endlessly customizable.
Ingredients
- 1 can (8 oz) refrigerated crescent roll dough
- 2 oz semi-sweet chocolate chips (or filling of choice: mini marshmallows, creamy peanut butter, fruit jam/preserves, pumpkin butter/puree)
- 1 tbsp unsalted butter, melted
- 1 tbsp granulated sugar
- 1/2 tsp ground cinnamon (optional)
- Colored icing (optional, for decoration)
- Sprinkles or edible glitter (optional, for decoration)
Instructions
- Preheat oven to 375°F (190°C). Line a baking sheet with parchment paper.
- Open the can of crescent rolls and unroll the dough. Separate into 8 triangles.
- Place a small spoonful (about 1/2 tbsp) of your chosen filling at the wide end of each triangle.
- Roll up each triangle loosely from the wide end. Pinch the narrow tip and bend it into a curved ‘witch hat’ point.
- Arrange rolls on the baking sheet, spaced about 2 inches apart, with hat points visible.
- Brush melted butter over the tops of each roll.
- Mix sugar and cinnamon in a small bowl. Sprinkle over the buttered rolls.
- Bake for 10-12 minutes, until golden brown and crisp.
- Transfer rolls to a cooling rack for 5 minutes. Decorate with colored icing or sprinkles if desired.
- Serve warm or at room temperature.
Notes
Keep crescent dough cold for best shaping. Don’t overfill to prevent leaks. Rotate pan halfway for even browning. Decorate while warm for best results. For gluten-free or vegan, use appropriate dough and fillings. Rolls can be made ahead and reheated in the oven.
- Prep Time: 10 minutes
- Cook Time: 12 minutes
- Category: Snack
- Cuisine: American
Nutrition
- Serving Size: 1 roll
- Calories: 170
- Sugar: 7
- Sodium: 210
- Fat: 7
- Saturated Fat: 3
- Carbohydrates: 24
- Fiber: 1
- Protein: 2
Keywords: witch hat crescent rolls, Halloween snacks, fall treats, party food, crescent roll recipe, kid-friendly, easy baking, festive dessert