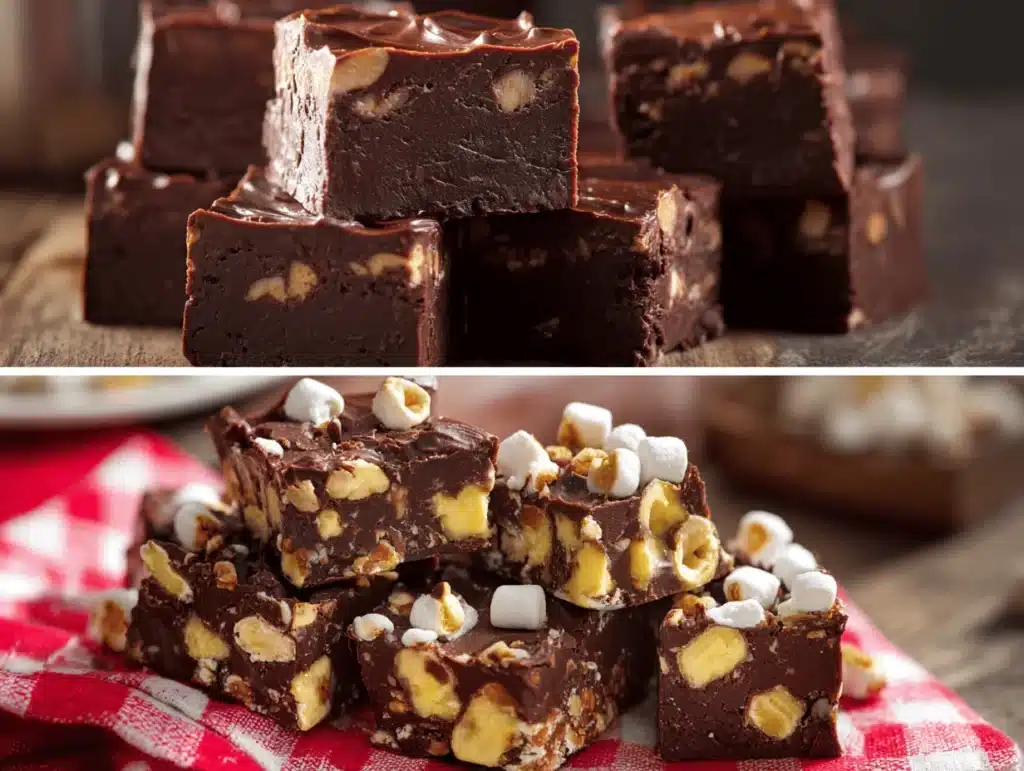
Chocolate melting in a saucepan, marshmallows puffing up and getting gooey, crunchy nuts scattered on top — that’s the moment when my kitchen smells like pure happiness. You know, there are desserts that just feel like a celebration, and Rocky Road Chocolate Fudge Bars are right at the top of that list for me. I’ve made these bars for birthday parties, rainy afternoons, and even as a pick-me-up when the week drags on. They always bring smiles, sticky fingers, and that “can I have another piece?” chorus that never gets old.
My obsession with rocky road started when I was little. My mom would let me help swirl the fudge and sprinkle the toppings, and I’d sneak extra marshmallows when she wasn’t looking. Over the years, the recipe has changed — smarter shortcuts, better chocolate, and a few personal twists — but the spirit is the same: rich, fudgy chocolate, pillowy marshmallows, and crunchy nuts, all packed into one glorious bar. Honestly, these Rocky Road Chocolate Fudge Bars are the kind of treat you’ll crave when you want something decadent without pulling out every bowl in your kitchen.
What makes these bars special? Let’s face it, they’re not just about the chocolate (though that’s key). It’s the mix of textures — smooth fudge, chewy marshmallows, and that nutty crunch — that makes every bite a party in your mouth. And they’re surprisingly easy, too! Whether you’re baking for a crowd or just want a stash of chocolatey goodness for yourself (no judgment), this rocky road chocolate fudge bars recipe delivers every single time. I’ve tested it, tweaked it, and shared it with friends who begged for the recipe — it’s a keeper, trust me.
Why You’ll Love This Recipe
After making these rocky road chocolate fudge bars more times than I care to admit, I can say with total confidence: they’re unbeatable. I’ve tried fancy versions, quick versions, and even “healthier” spins, but nothing compares to this balance of rich fudge and classic rocky road toppings. Here’s why you’ll be hooked:
- Quick & Easy: You need less than 30 minutes of actual work — and no baking! Perfect for those last-minute sugar cravings or when you want a fuss-free treat.
- Simple Ingredients: Pantry staples, nothing weird. You probably have most of what you need already — just grab some good chocolate, mini marshmallows, and nuts.
- Perfect for Any Occasion: These bars shine at birthdays, potlucks, holiday gatherings, or just as a sweet afternoon snack. I’ve packed them in lunchboxes and brought them to office parties — always a hit.
- Crowd-Pleaser: Kids love the marshmallows, adults love the deep chocolate flavor, and everyone loves the combo. They disappear fast, so be ready to share the recipe!
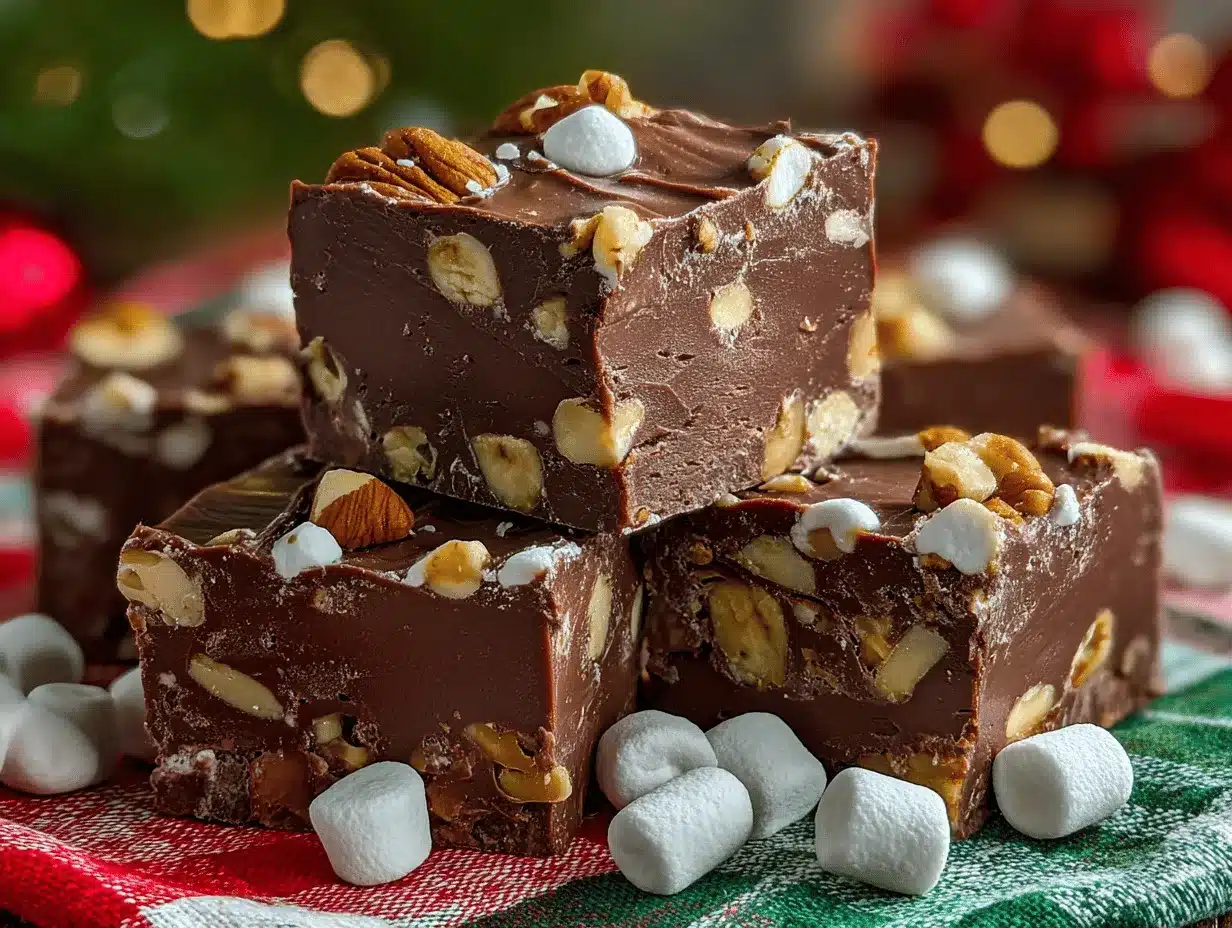
- Unbelievably Delicious: Fudgy, chewy, crunchy, and sweet — the ultimate comfort food in bar form. It’s the kind of treat that makes you close your eyes and smile after the first bite.
What makes these rocky road chocolate fudge bars stand out? For starters, I use a mix of semisweet and dark chocolate for a deeper, less-sweet flavor. The marshmallows stay soft (no melting into oblivion), and the nuts add that crave-worthy crunch. Sometimes I toss in a handful of dried cherries for a fruity twist — and honestly, that’s a move I learned after one too many batches where I just wanted “something extra.”
If you’re looking for a dessert that’s nostalgic but not boring, comforting but a little sophisticated, and so easy you’ll wonder why you ever bothered with boxed mixes, this is it. Rocky road chocolate fudge bars are truly the best version I’ve ever made — and I’m excited to share every tip and trick I’ve picked up along the way!
Ingredients Needed
This recipe keeps things simple, but every ingredient brings something special to the table. Here’s what you’ll need to whip up the ultimate rocky road chocolate fudge bars — plus a few notes for substitutions and personal preferences:
- For the fudge base:
- 2 ½ cups (400g) semisweet chocolate chips (or chopped chocolate) — I love using Ghirardelli or Guittard for the best melt and flavor.
- 1 cup (170g) dark chocolate chips — adds richness and balances the sweetness.
- 1 (14 oz/397g) can sweetened condensed milk — gives that signature creamy, dense texture.
- 4 tablespoons (56g) unsalted butter — cut into pieces for easier melting (adds silkiness).
- ½ teaspoon sea salt — brings out the chocolate flavor.
- 1 teaspoon pure vanilla extract — rounds out the sweetness.
- For the rocky road topping:
- 1 ½ cups (75g) mini marshmallows — the classic choice, but feel free to chop regular marshmallows if that’s what you have.
- 1 cup (120g) roasted peanuts or walnuts, coarsely chopped — I’m partial to salted peanuts for that sweet-and-salty kick, but walnuts or pecans work great.
- ½ cup (75g) milk chocolate chips or chunks — optional, for extra chocolatey goodness on top.
- ½ cup (80g) dried cherries or cranberries — optional, but so good for a hint of tartness (especially around the holidays).
Ingredient notes & substitutions:
- If you’re dairy-free, swap the butter for coconut oil and use a dairy-free condensed milk (Nature’s Charm makes a good one).
- Want gluten-free rocky road chocolate fudge bars? All the core ingredients are naturally gluten-free, just double-check your chocolate brands and marshmallows.
- You can use almond flour or coconut flour for added texture in the topping, but it’s totally optional.
- Prefer a nut-free version? Use sunflower seeds or pumpkin seeds instead of peanuts or walnuts.
- For a more intense chocolate flavor, increase the dark chocolate and decrease the semisweet by ½ cup.
Everything in this list is easy to find, and the recipe is flexible enough for swapping based on what’s in your pantry. I really believe great rocky road chocolate fudge bars start with good chocolate and fresh nuts — don’t skimp!
Equipment Needed
You don’t need a fancy kitchen to make these rocky road chocolate fudge bars — just a few basics and maybe a couple of handy tools:
- 8×8-inch (20x20cm) square baking pan — lined with parchment for easy removal. If you only have a 9×9, just watch the thickness.
- Medium saucepan — for melting the chocolate and butter. Nonstick works best for cleanup.
- Heatproof spatula — helps scrape every last bit of fudge out (I use my trusty silicone one that’s survived countless batches).
- Mixing bowls — for tossing the toppings and keeping things organized.
- Measuring cups and spoons — for accuracy (especially with chocolate and sweetened condensed milk).
- Sharp knife — for chopping nuts and slicing finished bars.
- Parchment paper — makes lifting and cutting a breeze.
If you don’t have a square pan, you can use a loaf pan for thicker bars or a rectangular pan for thinner ones. No saucepan? Microwave the chocolate and butter together in 30-second bursts, stirring each time — just watch carefully to avoid burning. My silicone spatula is a lifesaver and easy to clean; just soak it right after use if the fudge sticks. For budget-friendly options, check local dollar stores or thrift shops — I scored my favorite baking pan for a couple bucks!
Preparation Method
Ready to make your rocky road chocolate fudge bars? Here’s the step-by-step process I’ve honed over dozens of batches. These instructions are clear, with little tips and what to watch for, so you get perfect bars every time!
- Prep your pan and ingredients:
Line an 8×8-inch (20x20cm) square pan with parchment paper, leaving an overhang for easy lifting. Chop your nuts and measure all ingredients before starting — trust me, having everything ready makes the process smoother. - Melt the chocolate and butter:
In a medium saucepan over low heat, combine semisweet chocolate chips, dark chocolate chips, sweetened condensed milk, and unsalted butter. Stir gently and constantly, until the mixture is smooth and glossy (about 3-5 minutes). Don’t rush — too much heat can scorch the chocolate, so keep it low and slow. If you see the chocolate starting to separate or look grainy, add a tablespoon of milk and whisk briskly. - Add vanilla and salt:
Remove the pan from heat. Stir in the vanilla extract and sea salt. The mixture should smell rich and inviting — almost like hot cocoa, but thicker. Taste a tiny bit (careful, it’s hot!) to check balance. - Pour and spread the fudge base:
Pour the chocolate fudge mixture into your prepared pan. Use a spatula to spread it evenly, getting into corners. The fudge will be thick, so work quickly before it starts to set. - Add the rocky road toppings:
While the fudge is still warm, sprinkle mini marshmallows, chopped nuts, and (if using) dried cherries over the top. Press them in gently with the spatula or your hands. Scatter milk chocolate chips or chunks if you like extra chocolate on top. Make sure toppings are evenly distributed for every bite! - Chill to set:
Cover the pan loosely with foil or plastic wrap. Refrigerate for at least 2 hours, or until the fudge is firm and set. If you’re in a hurry, stick it in the freezer for 45 minutes — just don’t forget it, or the marshmallows might get icy. - Slice and serve:
Once set, lift the fudge out using the parchment overhang. Place on a cutting board and slice into bars (16 large or 24 smaller pieces). Use a sharp, warm knife — I run mine under hot water and wipe dry between cuts for clean edges. Bars should look glossy, with marshmallows popping out and nuts peeking through.
Preparation notes: If you notice marshmallows melting into the fudge, let the base cool for 2 minutes before adding toppings. For extra crunch, toast your nuts before chopping. If your fudge is too soft after chilling, freeze it for another 30 minutes. Always check the bottom of the pan — fudge can be sticky, so parchment is your friend!
I like to sneak a taste of the warm fudge base with a spoon, just to make sure it’s as chocolatey as I want. If you want perfectly square bars, measure before slicing — but honestly, a little unevenness just means more taste tests for you!
Cooking Tips & Techniques
Making rocky road chocolate fudge bars is pretty forgiving, but I’ve picked up some tricks after a few rookie mistakes (like chocolate burning or marshmallows melting into oblivion):
- Low and slow is key: Chocolate needs gentle heat. Always melt on low, and stir often. If you rush, the chocolate can seize or burn — trust me, I’ve ruined a batch by getting impatient.
- Mix-ins matter: Add toppings when the fudge is warm, but not hot. Marshmallows can melt too much if the base is piping hot; waiting a minute helps keep them whole and pillowy.
- Test for set: Fudge should feel firm to the touch before slicing. If it’s still sticky after chilling, pop it in the freezer for a bit. Soft fudge is still delicious, but harder to cut cleanly.
- Cutting bars: Use a sharp, warmed knife for neat edges. Wipe the blade between cuts to avoid sticky buildup — especially with marshmallows and dried fruit in the mix.
- Multitasking: While the fudge sets, prep toppings, clean up, and plan your presentation. It makes the process feel quick, and you’ll be ready to serve as soon as they’re firm.
- Consistency tips: Use the exact measurements for chocolate and condensed milk — too much liquid can make fudge gooey, too little makes it crumbly. If you want firmer bars, add ¼ cup more chocolate chips.
I’ve learned to trust my senses with this recipe — chocolate should smell rich, fudge should look glossy, and toppings should stay visible. Don’t stress if your bars aren’t perfectly square or the topping isn’t perfectly even. Rocky road is all about that homemade, slightly messy charm!
Variations & Adaptations
Rocky road chocolate fudge bars are endlessly customizable. I love playing with new flavors and textures, depending on what’s in my pantry or who I’m baking for. Here are just a few ways to make this recipe your own:
- Dietary swaps:
- Nut-free: Use seeds (sunflower, pumpkin) or omit nuts entirely. Add pretzel pieces for crunch!
- Dairy-free: Swap butter for coconut oil and use dairy-free condensed milk and chocolate chips.
- Gluten-free: All main ingredients are naturally gluten-free, but always check labels for cross-contamination.
- Seasonal twists:
- In summer, add dried strawberries or blueberries for fruity pops.
- For fall, try pecans and drizzle with caramel sauce before chilling.
- Winter holidays? Toss in crushed peppermint candies for a festive touch.
- Flavor upgrades:
- Add a sprinkle of flaky sea salt on top after chilling for a grown-up finish.
- Mix in ½ teaspoon instant espresso powder with the chocolate for deeper flavor.
- Try almond extract instead of vanilla if you want an extra nutty aroma.
I once made a “trail mix” version with dried apricots, coconut flakes, and pistachios — it was wild, but surprisingly delicious. Don’t be afraid to experiment and make these bars truly yours!
Serving & Storage Suggestions
These rocky road chocolate fudge bars are best served slightly chilled, but not rock-hard. I love plating them on a big board, scattered with extra marshmallows and nuts for that Pinterest-worthy look. They pair perfectly with coffee, cold milk, or even a scoop of vanilla ice cream.
- Serving: Cut into squares and serve straight from the fridge for clean edges. Let them sit out for 10 minutes if you prefer a softer bite. For parties, wrap individual bars in wax paper for easy grab-and-go treats.
- Storage: Store bars in an airtight container in the refrigerator for up to 1 week. If stacking, use parchment between layers to prevent sticking.
- Freezing: These freeze beautifully! Place bars in a single layer, freeze until firm, then transfer to a freezer bag. They’ll keep for 2 months. Thaw overnight in the fridge before serving.
- Reheating: No need to reheat, but if you like warm fudge, microwave a bar for 5-10 seconds. Don’t overdo it, or the marshmallows will melt.
- Flavor development: The chocolate flavor deepens after a day in the fridge, and the marshmallows stay chewy. Honestly, leftovers might taste even better!
I always stash a few bars in the freezer for surprise guests — or just for myself when I need a sweet pick-me-up!
Nutritional Information & Benefits
Here’s a quick look at what you’re getting per bar (based on 24 bars):
- Calories: ~180
- Fat: ~9g (mostly from chocolate and nuts)
- Sugar: ~17g
- Protein: ~2g
Rocky road chocolate fudge bars are definitely a treat, but there are some upsides! Nuts provide healthy fats and a little protein, while dark chocolate is packed with antioxidants. If you use dried fruit, you’ll get some fiber, too. The recipe is naturally gluten-free and can be made dairy-free with easy swaps. Common allergens include nuts, dairy, and soy (in some chocolates) — always check labels if you’re serving a crowd.
Personally, I love knowing that a homemade treat like this avoids preservatives and mystery ingredients. It’s pure comfort in every bite!
Conclusion
If you’ve made it this far, you’re probably craving rocky road chocolate fudge bars — and I can’t blame you! These bars are rich, indulgent, and just the right mix of chewy, crunchy, and fudgy. I love how easy they are to customize, and honestly, they’re the kind of dessert that brings people together. Whether you’re making them for a special occasion or just because, you’ll end up with a tray of treats that everyone will remember.
Don’t be afraid to make this recipe your own — swap in your favorite nuts, add a dash of sea salt, or toss in some dried fruit for a personal twist. I make these whenever I want something sweet and nostalgic, and they’ve never let me down. If you try them, I’d love to hear your favorite tweaks or see your creations. Drop a comment below, share the recipe, or tag me with your rocky road chocolate fudge bars on social — I can’t wait to see what you come up with!
Happy baking, and may your fudge always be rich and your marshmallows perfectly pillowy!
Frequently Asked Questions
How long do rocky road chocolate fudge bars last?
They’ll stay fresh for up to a week in the fridge, or two months in the freezer. Just keep them in an airtight container for best texture.
Can I make rocky road chocolate fudge bars without nuts?
Absolutely! Swap nuts for seeds, pretzels, or just use extra marshmallows and chocolate chips.
Is it possible to make these bars dairy-free?
Yes! Use coconut oil instead of butter and dairy-free condensed milk and chocolate chips. The texture is just as delicious.
Why did my marshmallows melt into the fudge?
The fudge base was probably too hot. Let it cool for a minute before adding toppings, and gently press marshmallows on top.
Can I double the recipe for a larger crowd?
Definitely! Use a 9×13-inch pan, and chill for an extra hour to set. Slice into small squares for easy serving.
Pin This Recipe!

Rocky Road Chocolate Fudge Bars
- Total Time: 2 hours 20 minutes
- Yield: 16-24 bars 1x
Description
These easy, rich, and indulgent Rocky Road Chocolate Fudge Bars combine fudgy chocolate, pillowy marshmallows, and crunchy nuts for the ultimate celebratory treat. No baking required—just melt, mix, chill, and enjoy a decadent snack perfect for any occasion.
Ingredients
- 2 1/2 cups semisweet chocolate chips (about 15 oz)
- 1 cup dark chocolate chips (about 6 oz)
- 1 (14 oz) can sweetened condensed milk
- 4 tablespoons unsalted butter, cut into pieces
- 1/2 teaspoon sea salt
- 1 teaspoon pure vanilla extract
- 1 1/2 cups mini marshmallows
- 1 cup roasted peanuts or walnuts, coarsely chopped
- 1/2 cup milk chocolate chips or chunks (optional)
- 1/2 cup dried cherries or cranberries (optional)
Instructions
- Line an 8×8-inch square pan with parchment paper, leaving an overhang for easy lifting. Chop nuts and measure all ingredients before starting.
- In a medium saucepan over low heat, combine semisweet chocolate chips, dark chocolate chips, sweetened condensed milk, and unsalted butter. Stir gently and constantly until smooth and glossy, about 3-5 minutes.
- Remove from heat and stir in vanilla extract and sea salt.
- Pour the chocolate fudge mixture into the prepared pan and spread evenly with a spatula.
- While the fudge is still warm, sprinkle mini marshmallows, chopped nuts, and (if using) dried cherries over the top. Press gently to adhere. Scatter milk chocolate chips or chunks if desired.
- Cover the pan loosely and refrigerate for at least 2 hours, or until firm and set. For faster setting, freeze for 45 minutes.
- Lift the fudge out using the parchment overhang. Slice into bars (16 large or 24 smaller pieces) with a sharp, warm knife, wiping between cuts for clean edges.
- Serve slightly chilled or at room temperature. Store leftovers in an airtight container in the fridge for up to 1 week or freeze for up to 2 months.
Notes
For dairy-free, use coconut oil and dairy-free condensed milk and chocolate chips. For nut-free, swap nuts for seeds or pretzels. Toast nuts for extra crunch. Let fudge base cool slightly before adding marshmallows to prevent melting. Use a warm, sharp knife for clean cuts. Bars freeze well for up to 2 months.
- Prep Time: 15 minutes
- Cook Time: 5 minutes
- Category: Dessert
- Cuisine: American
Nutrition
- Serving Size: 1 bar (out of 24)
- Calories: 180
- Sugar: 17
- Sodium: 60
- Fat: 9
- Saturated Fat: 5
- Carbohydrates: 22
- Fiber: 2
- Protein: 2
Keywords: rocky road, chocolate fudge bars, no bake dessert, marshmallow, nuts, easy snack, party treat, gluten-free, dairy-free option