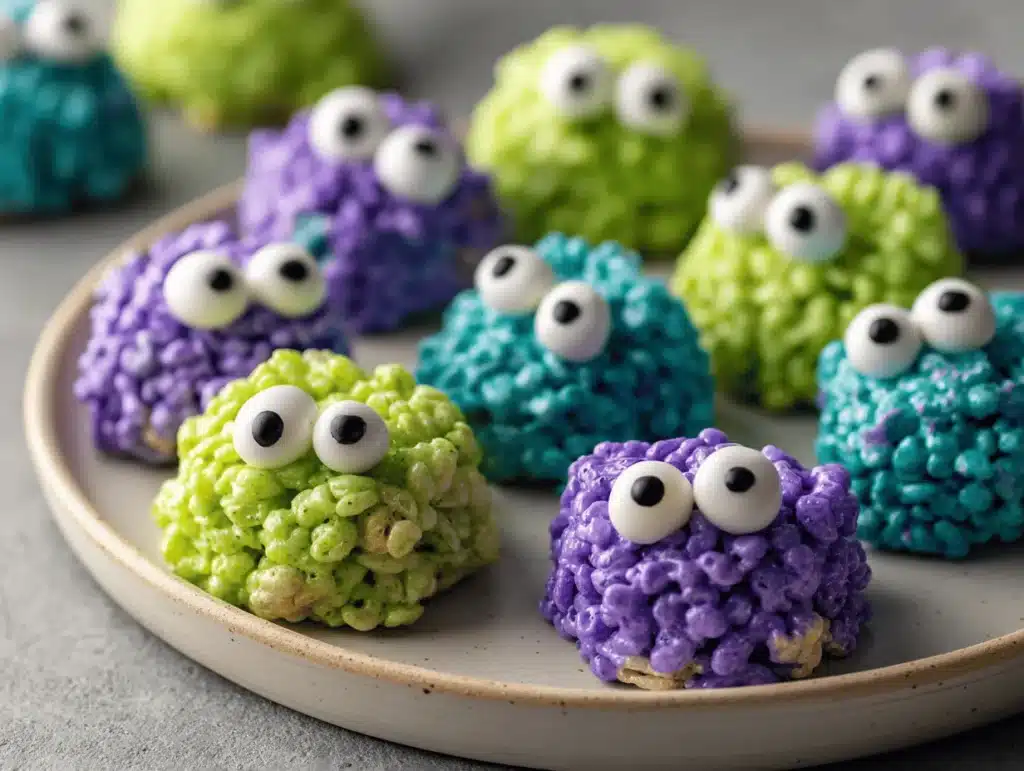
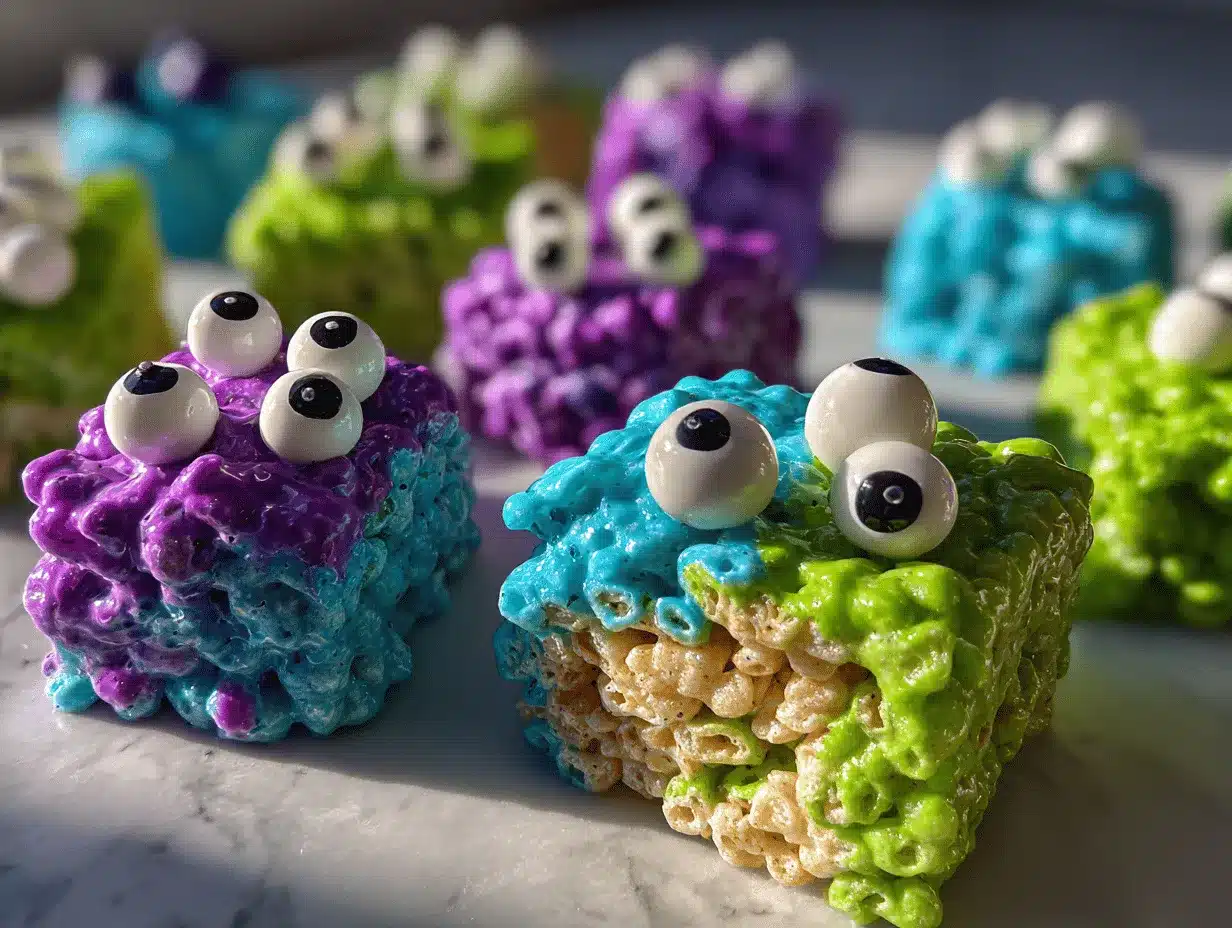
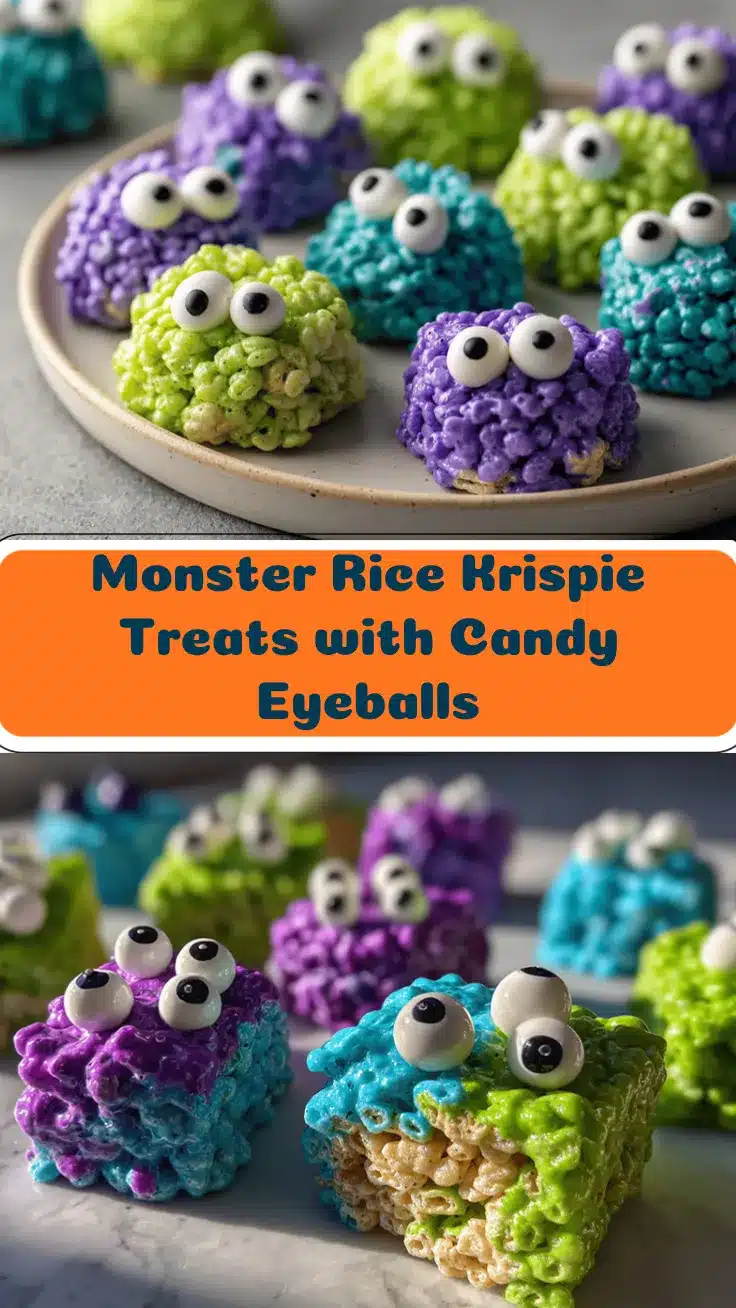
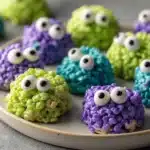
The crunch of gooey marshmallow, bright bursts of color, and those hilarious candy eyeballs staring up at you—Monster Rice Krispie Treats are what Halloween dreams (or nightmares?) are made of. The first time I whipped these up, my kitchen looked like a candy lab gone wild. Honestly, it was one of those magical afternoons when the kids were giggling, the counters were covered in sprinkles, and the treats disappeared faster than I could snap a photo! If you love easy, no-bake recipes that practically beg to be decorated and shared, you’re in for a treat—literally.
Monster Rice Krispie Treats with candy eyeballs are my go-to for class parties, spooky movie nights, and anytime I want to invite a little laughter to the table. They’re playful, sweet, and perfectly sticky. Plus, you can make them in less than 30 minutes. I remember discovering the original Rice Krispie Treats at a bake sale as a kid, but these monster versions? They’re a whole new level of fun. There’s something about the goofy expressions on the candy eyeballs that makes everyone smile (even the grown-ups, you know?).
What I love most is how these Monster Rice Krispie Treats bring people together. They’re perfect for busy families, creative kids, and anyone craving a simple Halloween snack. Over the years, I’ve tested different marshmallow ratios and food coloring combos, and trust me—these are foolproof. As a long-time home baker with a house full of picky eaters, I can say these treats never fail. So, grab those candy eyeballs and let’s get a little spooky in the kitchen!
Why You’ll Love This Recipe
- Quick & Easy: Ready in under 30 minutes, so you can whip them up even when you’re short on time.
- Simple Ingredients: No fancy shopping trips. If you’ve got Rice Krispies, marshmallows, butter, and some candy decorations, you’re good to go.
- Perfect for Halloween: These Monster Rice Krispie Treats are practically made for spooky parties, trick-or-treat events, and festive school snacks.
- Crowd-Pleaser: Kids (and adults!) can’t resist those silly candy eyeballs and neon colors. They’ll disappear faster than you expect.
- Unbelievably Delicious: Crunchy, chewy, and gooey—the classic Rice Krispie Treat texture with a monster twist.
Let’s face it, there are a million Rice Krispie Treat recipes out there, but these Monster Rice Krispie Treats stand out. What makes them different? For starters, I always use mini marshmallows for extra meltiness and add a dab more butter for that perfect soft chew. The food coloring transforms them into bright monsters, and the candy eyeballs bring the giggles. I’ve experimented with different brands of marshmallows and cereals, and honestly, the classic ones never let me down.
If you want a treat that’s easy to decorate, fun to make with kids, and guaranteed to get a reaction, this is it. You don’t need baking experience—just a sense of fun and a willingness to get a little messy (sprinkles everywhere, but hey, it’s Halloween!). Whether you’re making them for a party or just as a surprise after-school snack, Monster Rice Krispie Treats are a sweet way to add some playful spirit to your day.
Ingredients Needed
This recipe uses simple, pantry-friendly ingredients to deliver bold color, flavor, and texture—no fancy stuff required! You can easily swap a few things if needed, and I’ll share my favorite picks for the best results.
- Rice Krispies cereal (6 cups / 150g) – The classic choice for crisp texture. I stick with Kellogg’s for consistency.
- Mini marshmallows (5 cups / 280g) – They melt quickly and evenly. Jet-Puffed is my go-to (but any brand works).
- Unsalted butter (1/4 cup / 60g) – Adds richness and keeps the treats soft. If you only have salted, just skip extra salt.
- Vanilla extract (1 teaspoon / 5ml) – Optional, but it boosts flavor. Pure vanilla is best!
- Gel food coloring (assorted colors: green, purple, orange, blue)—Gel colors give the brightest monsters! Liquid colors work too, but aren’t as vivid.
- Candy eyeballs (about 40–60 pieces)—The key to monster faces. Wilton makes reliable ones, or you can use any brand you like.
- Sprinkles (optional, any style)—For extra pizzazz. Halloween-themed or rainbow, your choice!
If you’re looking for allergy-friendly options, you can use gluten-free crispy rice cereal and vegan marshmallows (like Dandies). For dairy-free, swap the butter with coconut oil or vegan margarine. The vanilla is totally optional, but I find it adds a cozy depth.
Want to change up the monster colors? Use whatever food coloring you have—just know that gel is the secret for those Instagram-worthy brights. If you’re feeling extra creative, add a pinch of cocoa powder for chocolate monsters or toss in some freeze-dried berry powder for fruity hues.
For the candy eyeballs, there are all shapes and sizes. Sometimes I buy the jumbo ones for a goofy look, and other times I mix sizes for variety. If you can’t find candy eyeballs, use mini chocolate chips or pipe on dots of icing. Sprinkles are totally optional, but they add a fun texture and sparkle—especially for Pinterest-worthy photos!
Last tip: measure your marshmallows by weight for the most consistent results. If you’re using large marshmallows, chop them up for faster melting. And if you want extra gooey treats, toss in another handful of marshmallows—no one’s complaining!
Equipment Needed
- Large saucepan – For melting butter and marshmallows. Nonstick is best for easy cleanup.
- Heatproof spatula or wooden spoon – Silicone spatulas are my favorite; they scrape every bit of sticky goodness.
- 9×13-inch (23×33 cm) baking pan – Standard size for thick, chewy bars. For thicker monsters, use an 8×8-inch pan.
- Parchment paper or nonstick spray – Keeps the treats from sticking. Trust me, don’t skip this!
- Mixing bowls – For dividing the mixture to color each batch. Any size works, but bigger bowls are easier to stir.
- Food-safe gloves (optional) – Great for pressing the sticky mixture into the pan if you hate marshmallow hands.
- Sharp knife – For clean, even slices. I use a plastic knife for best results—it cuts through without sticking.
If you don’t have a 9×13 pan, just use any baking dish with similar dimensions. Glass pans work, but metal pans cool faster. If you’re short on mixing bowls, you can color one batch at a time—just rinse between colors. And if you don’t have parchment paper, wax paper or aluminum foil with a little nonstick spray does the trick. I’ve even used a pizza cutter instead of a knife for slicing—no complaints!
For maintenance, always soak your sticky utensils in warm, soapy water right after you finish. Marshmallow can set like glue if you wait too long. If you’re investing in spatulas, silicone is worth every penny—mine have survived dozens of batches!
Preparation Method
-
Prepare your pan:
Line a 9×13-inch (23×33 cm) pan with parchment paper or spray lightly with nonstick spray. This makes it super easy to lift out the treats later (less mess!). -
Melt the butter:
In a large saucepan over medium-low heat, melt 1/4 cup (60g) unsalted butter. Watch for it to bubble gently—don’t let it brown. -
Add marshmallows:
Stir in 5 cups (280g) mini marshmallows. Keep stirring as they melt; you want a smooth, glossy mixture. If clumps form, lower the heat. If marshmallows aren’t melting evenly, add a tiny splash of water. -
Flavor it up:
Once melted, remove from heat and stir in 1 teaspoon (5ml) vanilla extract. If skipping vanilla, just move on. -
Divide for coloring:
If you want multiple monster colors, divide the melted marshmallow mixture into separate bowls (one for each color). This step’s messy, but worth it for rainbow monsters! -
Add food coloring:
Add a few drops of gel food coloring to each bowl. Stir until the color is bright and even. If the color looks pale, add more—gel is strong stuff! -
Mix in Rice Krispies:
To each colored marshmallow bowl, add 2 cups (50g) Rice Krispies cereal. Stir gently but quickly; the mixture sets fast. If it’s sticking too much, spray your spatula with a little nonstick spray. -
Layer in the pan:
Press each colored mixture into the prepared pan in sections or swirls for monster stripes. Use a spatula, or press gently with greased hands. Don’t worry about perfection—uneven swirls look cool! -
Cool and decorate:
Let the treats cool for 10–15 minutes. While still slightly warm, press candy eyeballs into the surface. Add sprinkles if you want extra flair. If treats are too warm, eyeballs might slide—wait a minute longer. -
Slice and serve:
Lift the treats out of the pan using the parchment. Use a sharp or plastic knife to cut into squares or rectangles. Wipe the knife between cuts for clean edges.
Tips: If your treats seem dry, you may have cooked the marshmallows too long. Next time, melt them over lower heat and stir constantly. For gooier monsters, add a handful of extra marshmallows right before mixing in cereal. If your kitchen is hot, work fast—the mixture sets quickly!
Cooking Tips & Techniques
After making Monster Rice Krispie Treats more times than I can count, I’ve learned a few tricks (and made plenty of mistakes along the way!).
- Use fresh marshmallows: Stale ones don’t melt right and can lead to crumbly treats. Trust me, I tried using an old bag once—never again!
- Melt slowly: Rushing the melting step can scorch the marshmallows or make the mixture tough. Keep it on medium-low and stir gently.
- Grease everything: A little nonstick spray on your spatula, hands, and pan makes the whole process smoother. You’ll thank me later!
- Coloring tips: Gel food coloring gives vibrant monsters. If you use liquid food coloring, expect softer hues. Add color before cereal for even distribution.
- Don’t overpack: Press the mixture gently into the pan. If you smash it down too hard, the treats can be dense instead of light and chewy.
- Eyeball placement: Add candy eyeballs while the treats are still warm so they stick. If you wait too long, dab a little melted marshmallow underneath to glue them on.
One time, I tried doubling the recipe and used a too-small pan. The monsters turned out super thick—funny, but hard to eat! Stick to the recommended pan size for best results. If you’re multitasking (like wrangling kids while stirring), set up all your colors and decorations ahead of time. The treats set fast once mixed, so have everything ready!
The biggest lesson? Don’t sweat the mess or the imperfections. Monster Rice Krispie Treats are supposed to be silly and unique. Lopsided eyeballs and wild colors just add to the charm!
Variations & Adaptations
- Gluten-Free Monsters: Use certified gluten-free crispy rice cereal and allergy-friendly marshmallows. Most candy eyeballs are gluten-free, but double-check labels.
- Dairy-Free or Vegan: Swap butter with coconut oil or vegan margarine, and use vegan marshmallows like Dandies. Vegan candy eyeballs are available online.
- Flavor Twists: Add a pinch of cinnamon for “monster spice,” or swirl in cocoa powder for chocolate monsters. For fruity monsters, mix in a little freeze-dried berry powder or orange zest.
If you want different cooking methods, try pressing the mixture into silicone muffin molds for round monsters, or shape it by hand into monster heads. You can also roll the mixture into balls for bite-sized monster pops—stick a lollipop stick in for party treats.
For allergy substitutions, use mini chocolate chips or colored icing dots instead of candy eyeballs. Sprinkles can help cover nut-free or dye-free requirements.
My favorite variation? Last year, I made “zombie monsters” with green food coloring and chocolate sprinkles as hair—huge hit with the kids! Don’t be afraid to get creative and let everyone decorate their own monster treat.
Serving & Storage Suggestions
These Monster Rice Krispie Treats are best served at room temperature, right after decorating. Arrange them on a festive Halloween platter or stack them in a spooky treat box for parties. For a fun twist, pierce each square with a popsicle stick for “monster pops”—great for little hands!
Pair with a cold glass of milk, hot cocoa, or apple cider for the full Halloween snack experience. They also go well with salty snacks like popcorn or pretzel sticks if you’re setting up a party table.
To store, cover the treats tightly with plastic wrap or place in an airtight container. They’ll stay fresh for up to 3 days at room temperature. For longer storage, freeze in layers separated by parchment paper for up to 1 month—just thaw at room temp before serving. If they start to dry out, a quick zap in the microwave (10 seconds) brings them back to life.
And here’s a secret: the flavors actually deepen overnight, so leftovers can taste even better the next day. Just keep them away from direct sunlight and heat (the eyeballs can melt!).
Nutritional Information & Benefits
Each Monster Rice Krispie Treat (about 2×2 inch square) has roughly 120–150 calories, with 2g fat, 28g carbs, and 1g protein. They’re low in cholesterol and sodium, and can be made nut-free or gluten-free with the right swaps.
Rice Krispies cereal offers some iron and B vitamins, while marshmallows contribute quick energy. The treats are naturally low in allergens if you use certified gluten-free and dairy-free ingredients. Candy eyeballs and sprinkles do add sugar—so enjoy in moderation!
From a wellness perspective, Monster Rice Krispie Treats are a fun, occasional snack perfect for celebrations. I always feel good serving them because they’re homemade, and I can control the ingredients. Plus, they’re great for sharing—building connection is healthy too!
Conclusion
Monster Rice Krispie Treats with candy eyeballs are more than just a snack—they’re a celebration in every bite. With bright colors, silly faces, and classic chewy texture, these treats bring out the playful side of Halloween. Whether you’re making them for a party, a classroom, or just a cozy night in, they’re guaranteed to spark smiles.
Feel free to swap ingredients, play with colors, and let your creativity run wild. I love this recipe because it’s so forgiving—no two monsters are ever the same, and that’s half the fun. If you try them, let me know your favorite twist. Share your creations, drop a comment, or tag me on social—I’d love to see your monster masterpieces!
So gather your ingredients, invite some helpers, and make memories in the kitchen. Happy Halloween, and happy snacking!
FAQs
How do I keep Monster Rice Krispie Treats from sticking to the pan?
Line your pan with parchment paper or use nonstick spray before pressing in the mixture. This makes lifting and slicing easy, with no gooey mess!
Can I make Monster Rice Krispie Treats ahead of time?
Absolutely! Store them in an airtight container at room temperature for up to 3 days, or freeze for up to a month. Decorate just before serving for best results.
What if I can’t find candy eyeballs?
No worries—you can use mini chocolate chips, colored icing dots, or even small marshmallows cut into circles. Get creative with whatever you have on hand!
How do I get vibrant monster colors?
Gel food coloring works best for bright, bold hues. Add it to the melted marshmallow mixture before stirring in the cereal for even color. Liquid food coloring gives softer shades.
Are Monster Rice Krispie Treats allergy-friendly?
They can be! Use gluten-free cereal and vegan marshmallows for dietary needs. Always check candy eyeball and sprinkle labels for allergens just to be safe.
Pin This Recipe!
Monster Rice Krispie Treats – Easy Halloween Snack with Candy Eyeballs
- Total Time: 25 minutes
- Yield: 16 squares 1x
Description
Monster Rice Krispie Treats are a playful, colorful, and gooey no-bake Halloween snack decorated with candy eyeballs and sprinkles. Perfect for parties, school events, or a fun afternoon in the kitchen with kids.
Ingredients
- 6 cups Rice Krispies cereal (about 150g)
- 5 cups mini marshmallows (about 280g)
- 1/4 cup unsalted butter (60g)
- 1 teaspoon vanilla extract (optional)
- Gel food coloring (assorted colors: green, purple, orange, blue)
- 40–60 candy eyeballs
- Sprinkles (optional, any style)
Instructions
- Line a 9×13-inch pan with parchment paper or spray lightly with nonstick spray.
- In a large saucepan over medium-low heat, melt the butter until it bubbles gently.
- Stir in the mini marshmallows and keep stirring until melted and smooth. If needed, add a tiny splash of water.
- Remove from heat and stir in vanilla extract (if using).
- Divide the melted marshmallow mixture into separate bowls for each color you want.
- Add a few drops of gel food coloring to each bowl and stir until the color is bright and even.
- To each colored marshmallow bowl, add 2 cups Rice Krispies cereal and stir quickly.
- Press each colored mixture into the prepared pan in sections or swirls for monster stripes. Use a spatula or greased hands.
- Let the treats cool for 10–15 minutes. While still slightly warm, press candy eyeballs into the surface and add sprinkles if desired.
- Lift the treats out of the pan using the parchment. Use a sharp or plastic knife to cut into squares or rectangles. Wipe the knife between cuts for clean edges.
Notes
Use fresh marshmallows for best texture. Gel food coloring gives the brightest colors. For allergy-friendly treats, use gluten-free cereal and vegan marshmallows. Add candy eyeballs while treats are still warm so they stick. Don’t overpack the mixture in the pan for light, chewy treats. Store in an airtight container for up to 3 days or freeze for up to 1 month.
- Prep Time: 10 minutes
- Cook Time: 10 minutes
- Category: Snack
- Cuisine: American
Nutrition
- Serving Size: 1 square (about 2x2 inches)
- Calories: 135
- Sugar: 15
- Sodium: 60
- Fat: 2
- Saturated Fat: 1
- Carbohydrates: 28
- Protein: 1
Keywords: Halloween, Rice Krispie Treats, Monster Treats, No-Bake, Kids Snack, Candy Eyeballs, Party Food, Easy Dessert