If you’ve ever walked into a room and caught the scent of cinnamon, nutmeg, and pumpkin swirling together, you know that autumn is officially here. Those spicy-sweet aromas instantly bring back memories of hayrides, cozy sweaters, and—my personal favorite—Halloween parties with tables absolutely loaded with treats. Honestly, nothing says “fall” quite like pumpkin pie, but let’s face it: slicing up a big pie for a crowd is messy, and sometimes you just want something cute and portable. That’s exactly why I started making these irresistible mini pumpkin pies. The first time I brought them to a Halloween bash, they vanished before I even managed to snag one for myself!
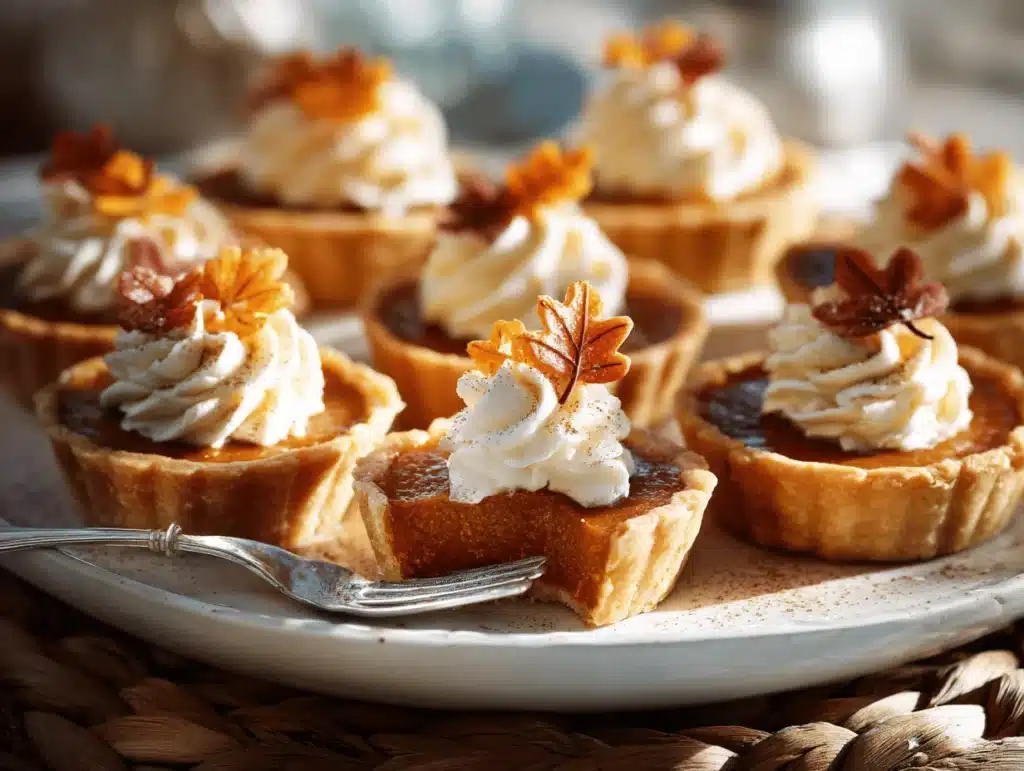
Mini pumpkin pies are the ultimate party dessert. They’re easy to grab, fun to decorate, and—here’s the kicker—they taste just as good as their full-sized cousins. I’ve tweaked this recipe over several autumns (and more than a few costume parties), aiming for a rich, creamy filling nestled in flaky, buttery crusts. Whether you’re hosting a monster mash or just need a cozy snack for movie night, these little pies pack all the flavor and nostalgia of classic pumpkin pie, but in a bite-sized, party-perfect package. Plus, you can whip up a batch super fast, which is a lifesaver when you’re juggling costumes, candy bowls, and last-minute decorations.
As a longtime home baker (and self-declared pumpkin fanatic), I’ve tested these mini pumpkin pies with all sorts of tweaks, from different crusts to various toppings. They’re foolproof, crowd-pleasing, and—thanks to their petite size—totally Instagram- and Pinterest-worthy. So, whether you’re a pumpkin pie purist or just looking for a new way to wow your guests, this mini pumpkin pies recipe is about to become your new Halloween tradition.
Why You’ll Love This Recipe
- Quick & Easy: Prepped and baked in under an hour, so you can spend more time enjoying the party—not stuck in the kitchen.
- Simple Ingredients: Everything you need is probably already in your pantry—no frantic trips to specialty stores required.
- Perfect for Halloween Parties: These mini pumpkin pies are made for sharing, stacking on treat trays, or popping into goody bags. They’re portable and totally festive.
- Crowd-Pleaser: I’ve brought these to gatherings with picky kids, pie-loving grandparents, and everyone in between. The verdict? Always a hit.
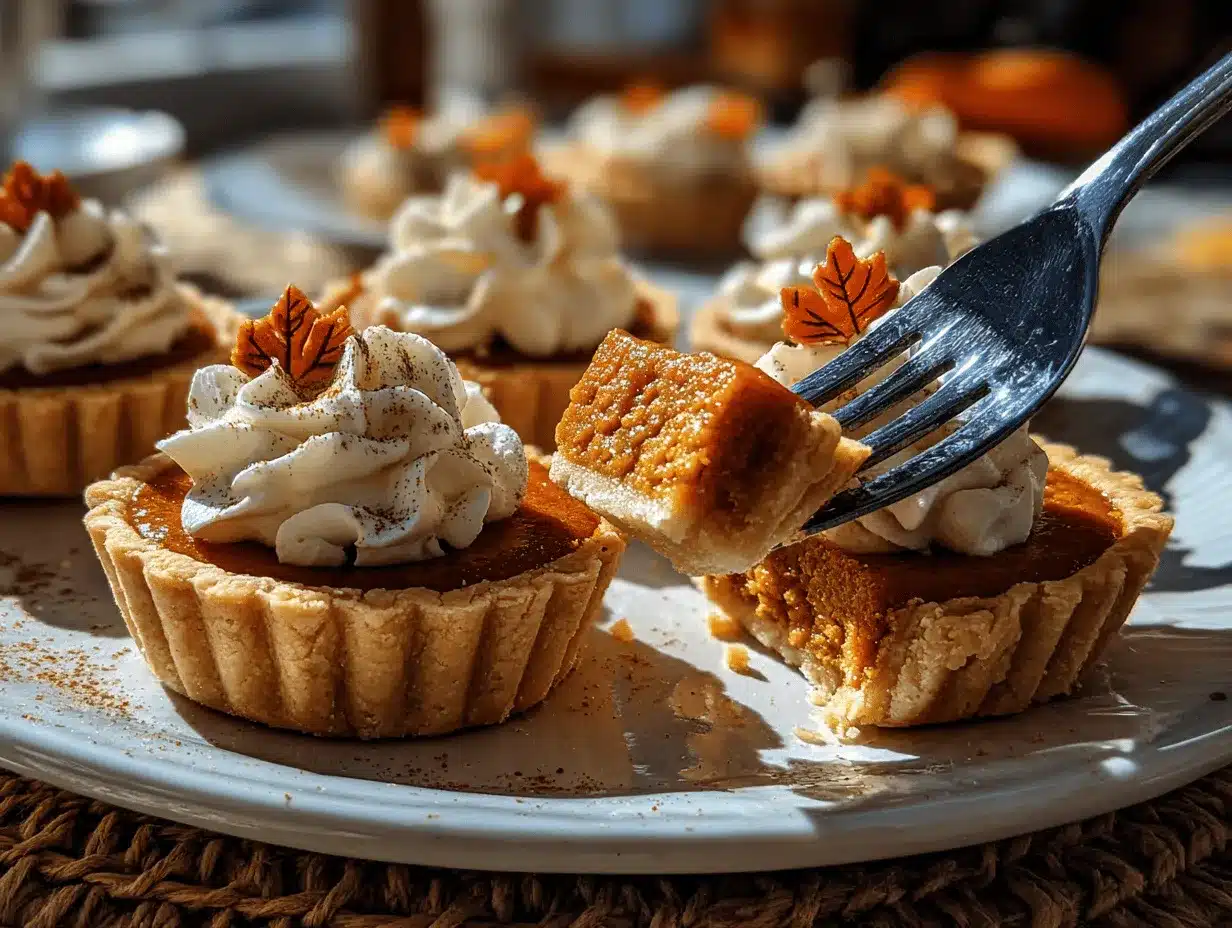
- Unbelievably Delicious: The crust is buttery and crisp, while the pumpkin filling is creamy, warmly spiced, and just sweet enough. It’s comfort food in every bite.
What makes these mini pumpkin pies stand out? For one thing, the filling is perfectly spiced—never bland or overly sugary. I use a blend of cinnamon, nutmeg, and a dash of ginger (sometimes extra cloves if I’m feeling bold) for that classic pumpkin punch. And the crust? You don’t have to fuss with rolling or crimping; it’s easy to shape right in a muffin tin, so each pie comes out just the right size.
I’ve tried pretty much every shortcut and hack out there, and this method always delivers. You can even get creative with decorations—think whipped cream ghosts, candy corn eyes, or sprinkles for a truly Halloween vibe. These mini pumpkin pies are more than just a dessert; they’re an experience. The kind of treat that makes people smile, linger at the dessert table, and ask for the recipe (trust me, it happens every single time).
Best of all, this is a recipe you’ll actually want to make again and again. It’s not just fun—it’s practical, reliable, and, let’s be honest, a little bit magical. If you love pumpkin pie, you’ll love these. If you’re new to baking, you’ll find them totally doable. And if you’re hunting for the perfect easy Halloween party dessert idea? You’ve just found it.
Ingredients Needed
This recipe leans on wholesome staples—the kind you probably already have tucked away in your kitchen. Nothing fancy, but each ingredient plays a key role in pulling off that classic pumpkin pie flavor and texture, just miniaturized for maximum fun.
- For the crust:
- 1 1/4 cups (150g) all-purpose flour (can sub gluten-free blend if needed)
- 1/2 cup (115g) unsalted butter, chilled and cubed (for the flakiest texture)
- 1/4 teaspoon salt
- 2-3 tablespoons (30-45ml) ice water (just enough to bring the dough together)
- Optional: 1 tablespoon sugar (for a slightly sweet crust)
- For the pumpkin filling:
- 3/4 cup (180g) canned pumpkin puree (make sure it’s pure pumpkin, not pie filling)
- 1/3 cup (80ml) evaporated milk (or sub whole milk for a lighter version)
- 1 large egg, room temperature
- 1/4 cup (50g) brown sugar, packed
- 1/2 teaspoon ground cinnamon
- 1/4 teaspoon ground nutmeg
- 1/8 teaspoon ground ginger
- 1/8 teaspoon ground cloves (optional, for extra warmth)
- Pinch of salt
- Optional: 1/2 teaspoon vanilla extract (for a hint of sweetness)
- For topping:
- Whipped cream (homemade or store-bought—your call!)
- Halloween sprinkles or colored sugar (for festive flair)
- Candy corn, mini marshmallows, or chocolate chips (totally optional, but so fun!)
If you’re looking for trusted brands—Libby’s for the pumpkin puree, Land O Lakes for butter, and McCormick for spices always deliver consistent results. If you need a dairy-free option, swap evaporated milk for canned coconut milk, and use a plant-based butter. For gluten-free crust, Bob’s Red Mill 1-to-1 Baking Flour works perfectly.
Seasonal swaps? Sure thing! Sometimes I toss in a handful of chopped pecans or swap brown sugar for maple syrup. If you’re making these outside of autumn, you can use sweet potato puree for a fun twist. The beauty of mini pumpkin pies is how flexible they are—feel free to experiment and make them your own.
Equipment Needed
- Muffin tin (12-count): Standard size works best, but you can use mini muffin tins for bite-sized pies—just adjust baking time.
- Mixing bowls: One for dough, one for filling. I use glass bowls because they’re easy to clean and don’t retain odors.
- Rolling pin: For rolling out the crust (a wine bottle works in a pinch—done that more than once!).
- Cookie cutter: 3-inch round cutter or even a drinking glass to cut out dough circles for the crust.
- Whisk: For blending the filling smoothly.
- Measuring cups and spoons: Accuracy matters here, especially for spices.
- Pastry brush: Optional, for brushing crusts with milk or egg wash (helps with browning).
- Cooling rack: For cooling the pies evenly (or just a clean kitchen towel if you’re low on gear).
If you don’t have a muffin tin, you can use small ramekins or even sturdy cupcake liners set on a baking sheet. I’ve made these with silicone muffin pans, and they pop out even easier. As for rolling pins, anything cylindrical works—just flour it well. My favorite tip: keep your tools cold for the flakiest crust. Budget-friendly options? Most dollar stores have basic muffin tins and measuring cups that do the trick.
Preparation Method
-
Prepare the crust:
In a large mixing bowl, combine 1 1/4 cups (150g) flour, 1/4 teaspoon salt, and 1 tablespoon sugar (if using). Add 1/2 cup (115g) chilled butter cubes. Using a pastry cutter or your fingertips, blend until the mixture resembles coarse crumbs—don’t overwork; a few pea-sized butter bits are perfect.
Drizzle in 2-3 tablespoons (30-45ml) ice water, mixing gently until the dough just comes together. If it’s dry, add a splash more water. Shape into a disc, wrap in plastic, and chill for 15-20 minutes. (Chilling helps prevent shrinkage in the oven.) -
Preheat the oven:
Set oven to 375°F (190°C). Grease a 12-count muffin tin (or line with cupcake liners for easy cleanup). -
Roll and cut the crusts:
On a lightly floured surface, roll dough to about 1/8-inch (3mm) thickness. Cut out 12 rounds using a 3-inch cutter or glass. Gently press each dough round into the muffin tin wells, making sure to cover the bottom and sides. Patch any cracks with extra dough. Dock the bottoms with a fork—this prevents bubbling. -
Mix the pumpkin filling:
In a medium bowl, whisk together 3/4 cup (180g) pumpkin puree, 1/3 cup (80ml) evaporated milk, 1 large egg, 1/4 cup (50g) brown sugar, 1/2 teaspoon cinnamon, 1/4 teaspoon nutmeg, 1/8 teaspoon ginger, 1/8 teaspoon cloves (optional), pinch of salt, and 1/2 teaspoon vanilla extract (optional). Blend until smooth and creamy—no lumps should remain. -
Fill the crusts:
Spoon or pour pumpkin filling evenly into each dough-lined muffin cup—about 1 1/2 tablespoons per pie. The filling should come almost to the top but not overflow. -
Bake:
Bake in preheated oven for 18-22 minutes, until the crusts are golden and the filling is set (it should jiggle slightly in the center but not look wet). Rotate the pan halfway for even baking.
If the crust edges brown too fast, loosely cover with foil. -
Cool:
Let pies cool in the tin for 10 minutes, then carefully lift out and transfer to a cooling rack. (Use a butter knife to loosen edges if needed.) Filling will firm as it cools. -
Decorate and serve:
Once cool, top with whipped cream, sprinkles, or Halloween candy. Serve at room temperature or slightly chilled. (If stacking for transport, wait to decorate until just before serving.)
Prep notes: If your dough feels sticky, dust with more flour. Too crumbly? Add a splash more water. For an extra-crisp crust, blind bake the dough rounds for 5 minutes before adding filling—though I rarely bother, since these are so tiny. Troubleshooting: If pies stick, let them cool longer before removing. Cracked filling? Overbaking is usually the culprit, so keep an eye on them after 15 minutes. My personal tip: Make the crust a day ahead and chill overnight—the flavor gets even better.
Cooking Tips & Techniques
- Keep everything cold: Cold butter and chilled dough are your best friends for flaky crust. If your kitchen is warm, pop your tools in the fridge for a few minutes.
- Don’t overmix: Overworking the dough makes it tough. Stop mixing as soon as the dough holds together.
- Consistent filling: Use a small ice cream scoop or tablespoon to portion filling—this keeps pies uniform and helps them bake evenly.
- Oven placement: Bake on the center rack for even heat. If you use more than one pan, rotate halfway through.
- Watch the timer: Mini pies bake quickly. The filling sets fast, so check at the 18-minute mark. If you’re multitasking (because who isn’t during party prep?), set a second timer on your phone.
- Decorating tips: For whipped cream ghosts, use a piping bag with a round tip. Add candy eyes for extra Halloween fun. If you want colored whipped cream, just fold in a drop of orange food coloring.
Common mistakes? I’ve baked my fair share of dry crusts—usually from overbaking. So if in doubt, pull them out a minute early. I’ve also filled a few pies too high (hello, overflow!), so stick to about 1 1/2 tablespoons per pie. My most memorable fail was forgetting the sugar in the filling—don’t make that mistake! Taste your filling before baking if you’re unsure.
Efficiency tip: Make the crust and filling ahead of time, stash in the fridge, and assemble just before baking. If you’re short on time, premade pie dough works in a pinch, though homemade always wins on flavor.
Variations & Adaptations
- Gluten-Free: Use a 1-to-1 gluten-free flour blend for the crust. Bob’s Red Mill is my go-to, and the taste is spot-on.
- Dairy-Free: Swap evaporated milk with canned coconut milk and use plant-based butter. The filling stays creamy, with a subtle tropical note.
- Sweet Potato Swap: Use sweet potato puree instead of pumpkin for a slightly earthier, sweeter flavor. This is especially fun for Thanksgiving!
- Spice Level: Add extra cinnamon or a dash of cardamom for more warmth. For a kid-friendly version, dial back the nutmeg and cloves.
- Crust Options: Graham cracker crusts work well—just press a mixture of crushed grahams and melted butter into the tin. No rolling needed!
Cooking methods? You can make these in an air fryer at 330°F (165°C) for about 12-14 minutes—just check early, since they cook fast. For extra crunch, sprinkle a little turbinado sugar on the crusts before baking.
Allergen substitutions: For egg-free, use a flaxseed “egg” (1 tablespoon ground flaxseed mixed with 2.5 tablespoons water). I’ve made this version for friends with allergies, and it works well—just a bit softer texture.
My favorite twist? Mixing a spoonful of maple syrup into the filling and topping each mini pie with candied pecans. It’s a little decadent, but hey, it’s a party!
Serving & Storage Suggestions
Mini pumpkin pies taste best at room temperature, but they’re also great chilled—especially if you add a dollop of whipped cream right before serving. For Halloween parties, I love arranging them on a big platter, ringed with candy corn and orange sprinkles for extra festive vibes.
Pair with hot apple cider, spiced tea, or a big mug of coffee for full autumn effect. These pies also make a killer addition to brunch spreads—try serving alongside fruit salad or breakfast sausage links for a sweet-and-savory combo.
Storage is a breeze: Once cool, store mini pumpkin pies in an airtight container in the fridge for up to 4 days. To freeze, place pies on a tray, freeze until solid, then transfer to a zip-top bag (they’ll keep for 2 months). Thaw overnight in the fridge and reheat at 300°F (150°C) for 8-10 minutes, or just enjoy cold.
If you make them a day ahead, wait to decorate with whipped cream until just before serving—otherwise, the topping can melt or get soggy. Honestly, the flavors get even better after a night in the fridge; the spices mellow and the pumpkin filling sets up beautifully.
Nutritional Information & Benefits
Each mini pumpkin pie (without toppings) contains approximately:
- Calories: 125
- Fat: 7g
- Carbohydrates: 15g
- Protein: 2g
- Fiber: 1g
- Sugar: 7g
Pumpkin is loaded with vitamin A, fiber, and antioxidants—great for eye health and immune support. Eggs add a little protein, and the spices (especially cinnamon and ginger) bring anti-inflammatory properties. If you go gluten-free or dairy-free, these mini pumpkin pies work for a wide range of diets. Just watch out for the butter and milk if you’re sensitive to dairy. As someone who tries to keep treats balanced, I love that these pies are single-portion and not overly sweet, making them a sensible option for parties and snack time alike.
Conclusion
There’s something downright magical about these mini pumpkin pies—they capture everything you love about autumn in a cute, party-ready package. Whether you’re hosting a Halloween bash or just craving a cozy dessert, this recipe delivers big flavor with minimal fuss. The pies are easy to customize, simple to prepare, and—honestly—impossible to resist. Every time I bake a batch, I’m reminded why they’re my go-to for fall gatherings.
Don’t be afraid to make them your own: swap spices, try new toppings, or experiment with different crusts. That’s half the fun! I hope you fall in love with these mini pumpkin pies as much as I have. If you try the recipe, drop a comment below, share your photos, or tag me on Pinterest—I’d love to see your spooky creations. Happy baking, and happy Halloween!
FAQs
Can I use store-bought pie crust for mini pumpkin pies?
Absolutely! Store-bought pie crust saves time. Just roll it out, cut into rounds, and press into the muffin tin. It works great for quick prep.
Can I make mini pumpkin pies ahead of time?
Yes, you can bake them up to two days ahead. Store in the fridge and add decorations right before serving for best texture and flavor.
How do I keep the crust from getting soggy?
Chill the dough before baking and dock the bottoms with a fork. If you’re worried, blind bake the crusts for five minutes before adding filling.
Can I freeze mini pumpkin pies?
Definitely! Freeze baked pies on a tray, then store in zip-top bags. Thaw overnight in the fridge and reheat gently before serving.
What’s the best way to decorate for Halloween?
Top with whipped cream ghosts, candy eyes, orange sprinkles, or mini marshmallows. Get creative—these pies are perfect for showing off your spooky style!
Pin This Recipe!
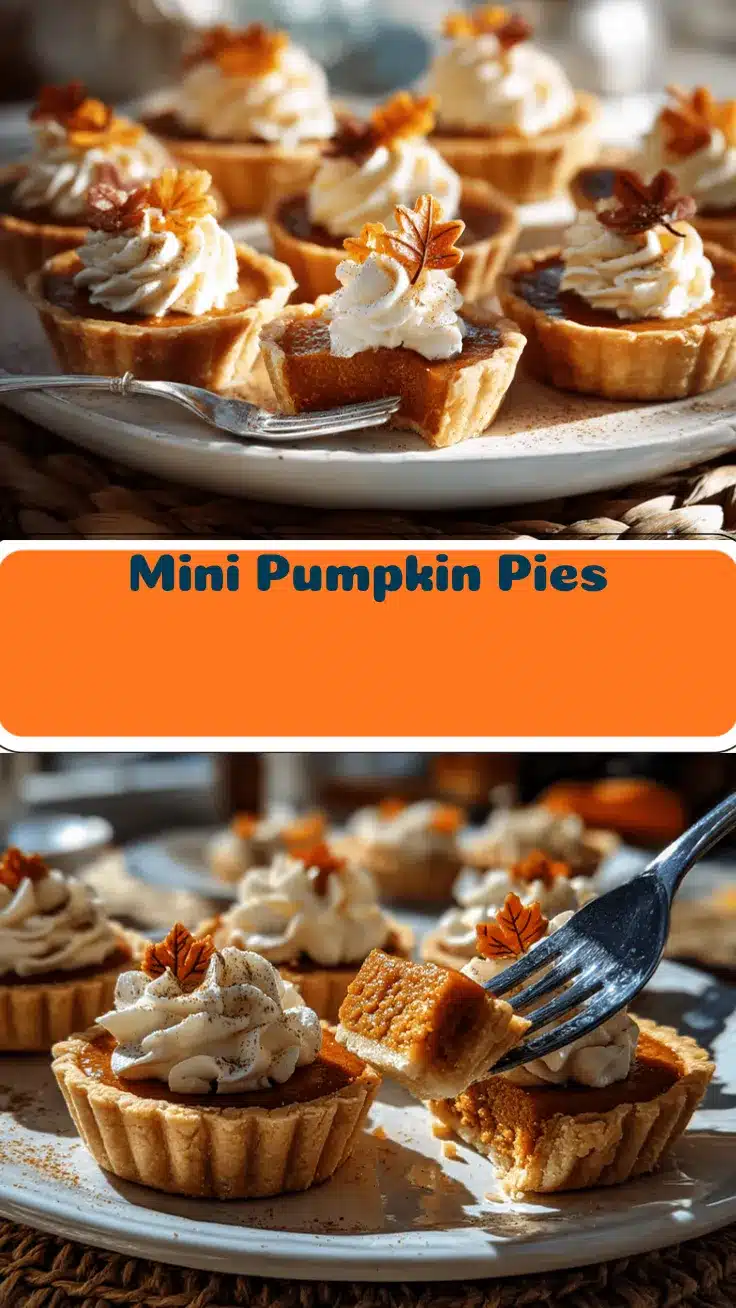

Mini Pumpkin Pies
- Total Time: 42 minutes
- Yield: 12 mini pies 1x
Description
These mini pumpkin pies are the perfect bite-sized dessert for Halloween parties and fall gatherings. With a creamy, spiced pumpkin filling and buttery, flaky crust, they’re easy to make, fun to decorate, and always a crowd-pleaser.
Ingredients
- 1 1/4 cups all-purpose flour (or gluten-free blend)
- 1/2 cup unsalted butter, chilled and cubed
- 1/4 teaspoon salt
- 2–3 tablespoons ice water
- 1 tablespoon sugar (optional, for sweet crust)
- 3/4 cup canned pumpkin puree
- 1/3 cup evaporated milk (or whole milk)
- 1 large egg, room temperature
- 1/4 cup brown sugar, packed
- 1/2 teaspoon ground cinnamon
- 1/4 teaspoon ground nutmeg
- 1/8 teaspoon ground ginger
- 1/8 teaspoon ground cloves (optional)
- Pinch of salt
- 1/2 teaspoon vanilla extract (optional)
- Whipped cream (for topping)
- Halloween sprinkles or colored sugar (for topping)
- Candy corn, mini marshmallows, or chocolate chips (optional, for topping)
Instructions
- In a large mixing bowl, combine flour, salt, and sugar (if using). Add chilled butter cubes and blend with a pastry cutter or fingertips until mixture resembles coarse crumbs.
- Drizzle in ice water, mixing gently until dough just comes together. Shape into a disc, wrap in plastic, and chill for 15-20 minutes.
- Preheat oven to 375°F (190°C). Grease a 12-count muffin tin or line with cupcake liners.
- On a lightly floured surface, roll dough to about 1/8-inch thickness. Cut out 12 rounds using a 3-inch cutter or glass. Press each round into muffin tin wells, covering bottom and sides. Dock bottoms with a fork.
- In a medium bowl, whisk together pumpkin puree, evaporated milk, egg, brown sugar, cinnamon, nutmeg, ginger, cloves (if using), salt, and vanilla extract (if using) until smooth.
- Spoon or pour pumpkin filling evenly into each dough-lined muffin cup (about 1 1/2 tablespoons per pie).
- Bake for 18-22 minutes, until crusts are golden and filling is set (slightly jiggly in center but not wet). Rotate pan halfway through baking.
- Let pies cool in tin for 10 minutes, then transfer to a cooling rack.
- Once cool, decorate with whipped cream, sprinkles, or Halloween candy. Serve at room temperature or chilled.
Notes
Keep butter and dough cold for the flakiest crust. Don’t overmix the dough. Use a small scoop for even filling. Blind bake crusts for extra crispness if desired. Decorate just before serving for best results. Store in airtight container in fridge up to 4 days or freeze up to 2 months.
- Prep Time: 20 minutes
- Cook Time: 22 minutes
- Category: Dessert
- Cuisine: American
Nutrition
- Serving Size: 1 mini pie
- Calories: 125
- Sugar: 7
- Sodium: 80
- Fat: 7
- Saturated Fat: 4
- Carbohydrates: 15
- Fiber: 1
- Protein: 2
Keywords: mini pumpkin pies, Halloween dessert, party treats, fall baking, bite-sized pumpkin pie, easy pumpkin pie, autumn recipes, Thanksgiving dessert