Introduction
The scent of warm spices swirling through my kitchen, thick and sweet, instantly transports me to cozy autumn days. Honestly, nothing shouts “fall” quite like pumpkin—and when you pair that with fudge, you get a dessert that’s absolutely irresistible. I first made creamy pumpkin fudge on a chilly Saturday while searching for a way to use up leftover pumpkin puree (it’s always hanging around after pie season, isn’t it?). One batch turned into three after my family devoured the first pan faster than I could snap a photo for Pinterest.
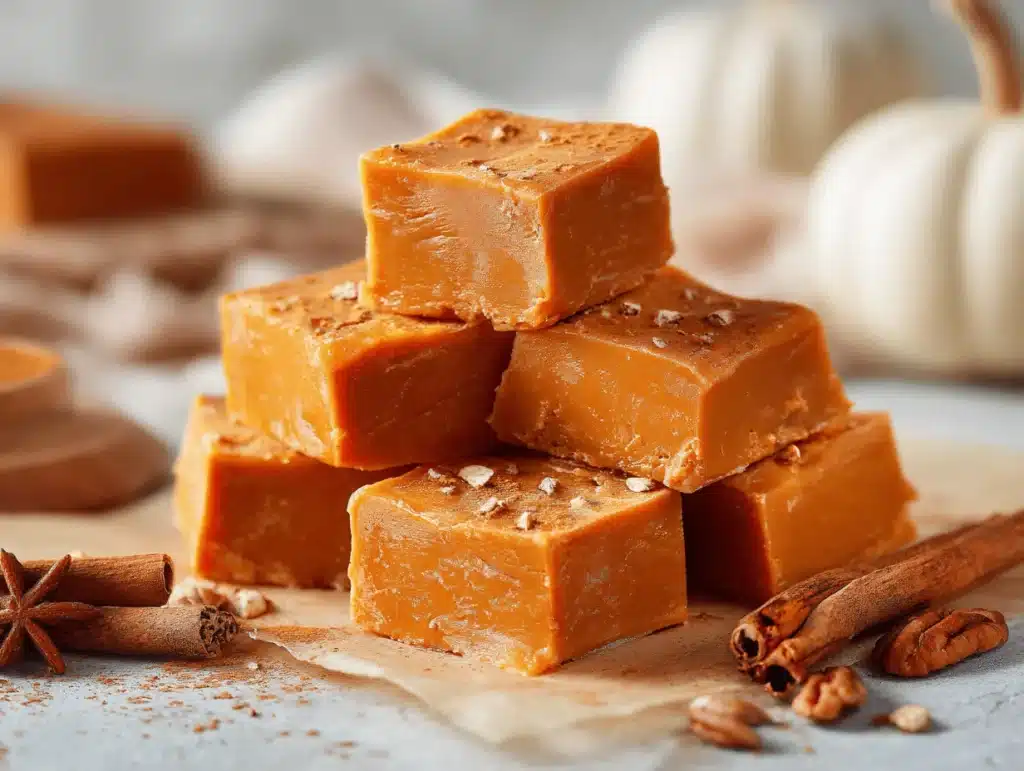
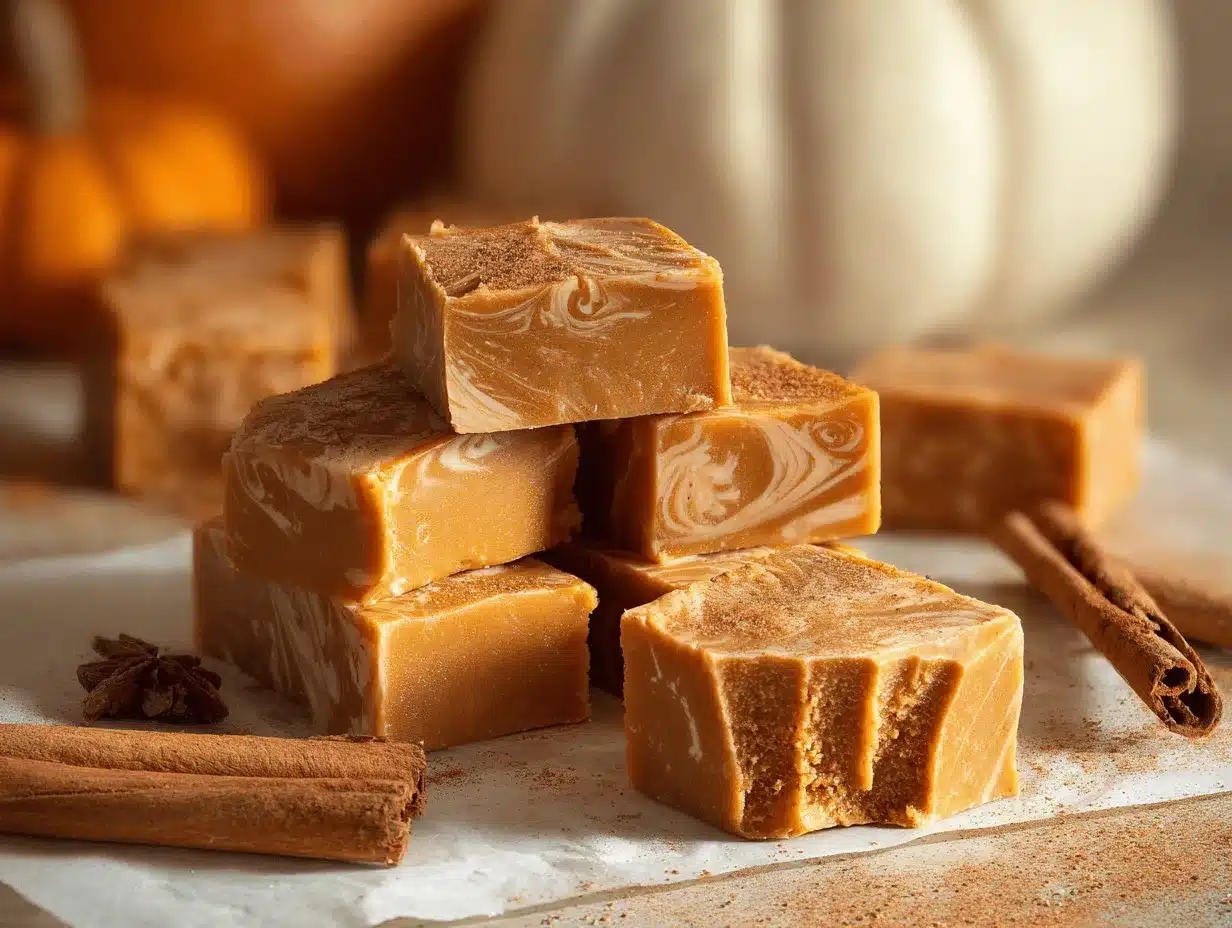
This creamy pumpkin fudge recipe has become my go-to homemade fall dessert, especially when I want something easy but impressive. It’s a dreamy mix of smooth pumpkin, brown sugar, and warm spices—all wrapped up in a soft, melt-in-your-mouth bite. Don’t let the word “fudge” intimidate you; I promise, it’s way simpler than you think and doesn’t require a candy thermometer (you know, one less kitchen gadget to dig out!). Whether you’re whipping up a batch for your own sweet tooth or gifting squares to friends, this fudge always brings smiles.
Over the years, I’ve tweaked and tested this recipe, finally landing on a version that’s perfectly creamy and never gritty. I love that you can make it ahead, customize the spices, and share a little autumn magic with everyone who tries it. If you’re searching for a homemade fall treat that’s a breeze to make and looks beautiful on a dessert tray, this creamy pumpkin fudge is calling your name.
Why You’ll Love This Recipe
- Quick & Easy: No fancy steps or special equipment needed—just a saucepan and a bit of stirring. From start to finish, you’ll have fudge ready in about 25 minutes (plus cooling time).
- Simple Ingredients: The pantry basics—pumpkin puree, sugar, butter, spices—come together for big flavor. You probably have most of these on hand already.
- Perfect for Fall Gatherings: Whether you’re hosting a Friendsgiving, family dinner, or just want something sweet after a long day, creamy pumpkin fudge fits the bill.
- Crowd-Pleaser: Kids gobble it up, and adults always ask for the recipe (especially those who love classic pumpkin pie flavors but want something a little different).
- Unbelievably Delicious: The soft, creamy texture melts in your mouth, and the pumpkin spice flavor is pure comfort food. It’s like autumn in every bite.
What sets this creamy pumpkin fudge apart is the balanced blend of sweet pumpkin and warm spices—plus, the technique of melting everything together gives you a super silky finish. No grainy fudge disasters here! I’ve also tested using different brands of pumpkin puree, and honestly, they all work beautifully. The trick is letting the mixture cook just long enough to meld the flavors but not so long that it dries out. It’s a little bit of dessert magic.
This isn’t your average fudge—it’s my best version, and it’s designed for busy folks who still want something homemade and special. After the first bite, you’ll see why it’s a Pinterest favorite and a must-make every fall. There’s something about the way this fudge comforts, delights, and brings people together that makes it so much more than just another sweet treat.
Ingredients Needed
This recipe uses simple, wholesome ingredients to deliver bold flavor and a satisfying, creamy texture. Most are pantry staples, and you can easily swap or adjust them as needed. Here’s what you’ll need:
- For the Fudge Base:
- 2 cups (400g) granulated sugar
- 1 cup (200g) packed brown sugar (light or dark—adds depth and caramel notes)
- 3/4 cup (170g) unsalted butter (softened, for richness)
- 2/3 cup (160g) evaporated milk (not sweetened condensed—this keeps the texture creamy)
- 1/2 cup (120g) pumpkin puree (not pumpkin pie filling; I like Libby’s for consistency)
- 2 tbsp (30ml) light corn syrup (helps with smooth texture)
- For Flavor & Texture:
- 1 1/2 tsp ground cinnamon
- 1/2 tsp ground nutmeg
- 1/4 tsp ground cloves
- 1/4 tsp ground ginger
- 1/8 tsp salt (balances the sweetness)
- 1 tsp vanilla extract (adds warmth)
- 2 cups (340g) white chocolate chips (or chopped white chocolate—brands like Ghirardelli melt smoothly)
- 1 cup (100g) mini marshmallows (helps with structure and a creamy bite)
- Optional Toppings:
- Chopped pecans or walnuts (for crunch)
- Extra cinnamon sugar sprinkle
- Drizzle of melted chocolate (for a pretty finish)
Substitutions & Tips:
- You can use coconut oil in place of some butter for a dairy-free version—just keep in mind the flavor will change slightly.
- For gluten-free needs, this recipe is naturally gluten-free as written.
- If you’re out of evaporated milk, try half-and-half or heavy cream (it’ll be richer).
- Add a pinch of cardamom for an extra cozy flavor, or swap pumpkin puree with sweet potato puree for a twist.
- If you like your fudge on the sweeter side, use a little more white chocolate chips—up to 2 1/2 cups (425g) works well.
I always recommend measuring the pumpkin puree carefully—too much and the fudge gets sticky, too little and it can be dry. Trust me, I’ve learned this the hard way!
Equipment Needed
- Medium saucepan (heavy-bottomed for even heating; I love my old stainless steel pot for fudge)
- Wooden spoon or heat-resistant spatula (for stirring—you want something sturdy)
- Measuring cups and spoons (accuracy matters for fudge texture)
- 8×8-inch (20x20cm) square baking pan (lined with parchment for easy removal)
- Whisk (helps blend spices and pumpkin into the sugar mixture)
- Small offset spatula (for smoothing the fudge in the pan—optional but handy)
- Knife (for cutting fudge into squares)
If you don’t have a square pan, use a round cake pan—the fudge will just be in wedges instead of squares. For stirring, I’ve used both silicone and wooden spoons; silicone is easier to clean, but wooden feels classic. Don’t stress about fancy tools—simple works just fine.
Pro tip: To keep your saucepan in top shape, soak it right after making fudge (sticky sugar can be stubborn otherwise!). If you’re on a budget, most tools are available at dollar stores or thrift shops—fudge doesn’t care how expensive your equipment is!
Preparation Method
- Prep your pan: Line an 8×8-inch (20x20cm) square baking pan with parchment paper, leaving some overhang for easy lifting. Lightly butter the parchment for extra insurance. Set aside.
- Combine base ingredients: In your medium saucepan, add the granulated sugar, brown sugar, unsalted butter, evaporated milk, pumpkin puree, corn syrup, cinnamon, nutmeg, cloves, ginger, and salt. Give it all a good whisk to blend the spices and pumpkin smoothly into the sugar mix.
- Heat and stir: Place the saucepan over medium heat. Stir constantly as the mixture melts together—about 4-5 minutes, until the butter has melted and everything looks smooth. Don’t crank the heat too high or you’ll risk burning the sugars.
- Boil gently: Bring the mixture to a gentle boil, stirring often. Once boiling, keep it going for 7-8 minutes, stirring constantly. The mixture should thicken slightly, and you’ll smell the spices blooming. If you see sugar crystals forming on the sides, gently scrape them down with your spatula.
- Remove from heat: Take the pan off the stove. Immediately add the white chocolate chips, marshmallows, and vanilla extract. Stir vigorously until the white chocolate and marshmallows are fully melted and the mixture looks glossy and uniform. (If it looks separated, keep stirring—it’ll come together.)
- Pour and smooth: Quickly pour the fudge into your prepared pan. Use a small offset spatula or the back of a spoon to smooth the top. Work fast—the fudge sets quickly!
- Add toppings: If you’re using nuts, cinnamon sugar, or a chocolate drizzle, sprinkle or drizzle them on now while the fudge is still soft.
- Cool and set: Let the fudge cool at room temperature for at least 2 hours. For firmer squares, pop the pan into the fridge for 45-60 minutes. The fudge should be firm but creamy—not hard.
- Cut and serve: Lift the fudge out of the pan using the parchment. Slice into 16 squares with a sharp knife, wiping the blade between cuts for clean edges.
Prep notes: If your fudge mixture looks too thick before adding the chocolate, add 1-2 tbsp (15-30ml) extra evaporated milk. If it seems grainy, stir a bit longer off the heat. The color should be a rich pumpkin orange and the aroma will be pure fall!
Efficiency tip: Measure all your ingredients before starting—fudge moves fast, and you don’t want to scramble for marshmallows mid-stir. Trust me, I’ve been there (the fudge doesn’t wait!).
Cooking Tips & Techniques
- Use a heavy-bottomed pan: Thin pans can cause hot spots that burn the sugar or pumpkin. A good, thick saucepan helps keep the heat even.
- Don’t rush the boil: The boiling phase is when the fudge gets its creamy texture. If you rush it, the sugar may not dissolve fully and you’ll get grainy fudge.
- Stir constantly: Fudge is a hands-on recipe. If you step away, the mixture can stick or burn. I’ve learned this the hard way (scraping burnt bits is no fun).
- Test for readiness: The mixture should be thick like a loose pudding before you add the chocolate and marshmallows. If it’s soupy, cook another minute or two.
- Multitasking tip: While your fudge cooks, prep toppings or line your pan so you’re ready to pour immediately. Fudge sets fast!
- Troubleshooting: If your fudge separates after adding chocolate, it’s usually because the mixture cooled too much. Return the pan to low heat and stir until it’s smooth again.
Common mistakes include not measuring ingredients accurately (fudge is picky!), letting the mixture boil too long (it’ll get dry), or forgetting to line the pan (sticky mess!). I’ve had my share of failed batches, but once you get the rhythm, it’s almost foolproof.
For consistency, always use pure pumpkin puree and good quality white chocolate. Cheap chips sometimes don’t melt smoothly, leading to lumpy fudge. If you want to prep ahead, measure everything out and even line your pan the night before.
Trust your senses—look for a silky texture, smell those spices, and taste a tiny bit before pouring if you want to adjust cinnamon or salt. Cooking fudge is part art, part science, and a little intuition goes a long way.
Variations & Adaptations
- Dairy-Free Pumpkin Fudge: Swap out butter for coconut oil and use dairy-free white chocolate chips (available at most health food stores). Substitute evaporated milk with coconut milk for a tropical twist.
- Nutty Pumpkin Fudge: Stir in 1/2 cup (60g) chopped toasted pecans or walnuts just before pouring the fudge into the pan. Adds crunch and a deeper flavor.
- Spiced Chocolate Pumpkin Fudge: Replace half of the white chocolate chips with dark chocolate chips. The result? A rich, bittersweet fudge with bold pumpkin spice notes.
Cooking Method Adjustments: If you prefer a microwave method, combine base ingredients in a microwave-safe bowl and heat in 1-minute bursts, stirring well in between, until smooth. Add chocolate and marshmallows, then continue stirring until melted. Pour into your lined pan as usual.
Customizing for Taste: If you love extra spice, double the cinnamon or add a pinch more ginger. For a sweeter fudge, increase the white chocolate chips by 1/2 cup (85g). If you prefer less sweet, use dark chocolate chips or omit marshmallows.
Allergen Substitutions: For nut-free fudge, skip the nuts or use pumpkin seeds for crunch. Gluten isn’t an issue here, but always check your chocolate chips for cross-contamination if needed.
Personal favorite? I once added a handful of dried cranberries to the fudge—tangy, sweet, and perfect for holiday trays. Get creative—the base recipe is super forgiving!
Serving & Storage Suggestions
Serve creamy pumpkin fudge chilled or at cool room temperature for the best texture. I love cutting the squares small—bite-size pieces look adorable on a fall dessert platter or wrapped up as a homemade gift.
- Presentation: Arrange squares on a pretty plate and sprinkle with extra cinnamon sugar or a few chopped nuts. For parties, place each piece in a mini cupcake liner.
- Pairing Suggestions: Serve alongside hot apple cider, pumpkin spice lattes, or a scoop of vanilla ice cream. It’s also great next to salty snacks like pretzels or roasted nuts for balance.
- Storage: Store fudge in an airtight container at room temperature for up to 3 days. For longer storage, refrigerate for up to a week—it’ll stay creamy. Freeze for up to 2 months, wrapped tightly in plastic and foil (thaw overnight in the fridge).
- Reheating: Fudge doesn’t need reheating, but if you like it super soft, pop a square in the microwave for 5 seconds. Watch out—it melts fast!
Flavor tip: The pumpkin spice flavor deepens after a day, so making the fudge ahead is actually a plus. If giving as a gift, wrap squares in wax paper and tie with twine for a Pinterest-worthy presentation.
Nutritional Information & Benefits
Each square of creamy pumpkin fudge (1/16 of the batch) is approximately:
- Calories: 170
- Fat: 7g
- Saturated Fat: 4g
- Sugar: 24g
- Protein: 1g
Pumpkin is a great source of vitamin A, fiber, and beta-carotene—so you’re sneaking a little nutrition into every bite. The spices (cinnamon, ginger, nutmeg) are full of antioxidants and add flavor without extra calories. This recipe is gluten-free and nut-free as written (unless you add nuts). It does contain dairy and marshmallows, so watch for those if allergies are an issue.
I love that this fudge satisfies a sweet tooth while using real pumpkin instead of artificial flavors. It’s a treat, for sure, but at least you know what’s in it—and you can always adjust the sugar or chocolate to fit your needs. For me, it’s a little bit of wellness wrapped up in a delicious fall package.
Conclusion
Creamy pumpkin fudge is the kind of homemade fall dessert that turns ordinary days into something special. It’s easy, fast, and packed with the comforting flavors of pumpkin and spice—plus, the creamy texture is out-of-this-world good. Whether you customize it with nuts, chocolate, or extra spice, this recipe is endlessly adaptable.
Honestly, I make this fudge every year and it never disappoints. It’s perfect for gifting, sharing, or just treating yourself after a long day. If you’re looking for a new favorite fall treat, creamy pumpkin fudge is your answer.
Give it a try, make it your own, and let me know how it turns out! I’d love to hear your tweaks, see your photos, and share in your fudge adventures (drop a comment below or pin your results!). Happy fall baking—may your kitchen smell amazing!
Frequently Asked Questions
Can I use fresh pumpkin instead of canned pumpkin puree?
Yes! Just roast and mash your pumpkin, then strain out extra liquid. Make sure it’s smooth and thick like canned puree for best results.
Do I need a candy thermometer to make this fudge?
Nope! This creamy pumpkin fudge recipe is designed to be simple—you just need to boil the mixture gently and stir well. No thermometer required.
What can I do if my fudge turns out grainy?
Grainy fudge usually means the sugar didn’t dissolve fully. Next time, stir constantly and don’t rush the boiling phase. For this batch, try microwaving it for a few seconds and stirring—it may smooth out.
Can I freeze pumpkin fudge?
Absolutely. Wrap the squares tightly in plastic and foil, then freeze for up to 2 months. Thaw overnight in the fridge before serving.
Is creamy pumpkin fudge gluten-free?
Yes, as written, this recipe is gluten-free. Just double-check your chocolate chips and marshmallows for any cross-contamination if needed.
Pin This Recipe!
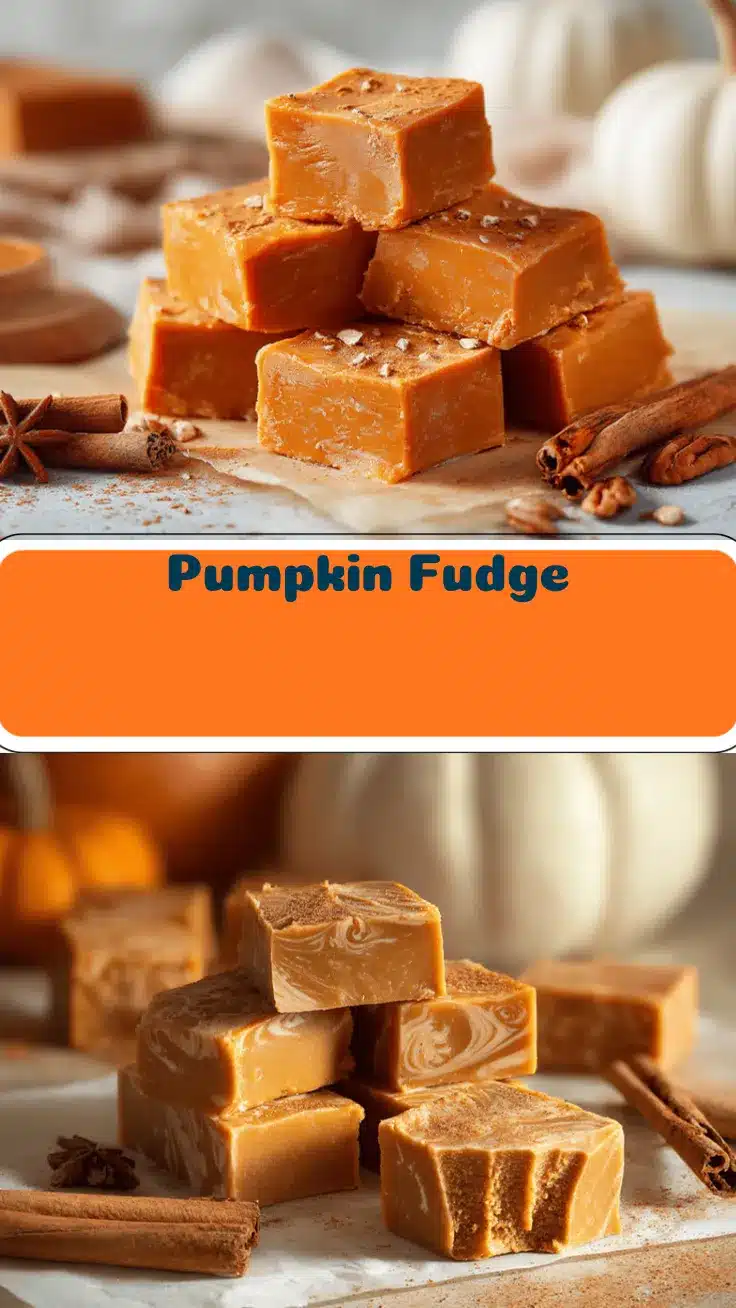
Creamy Pumpkin Fudge
- Total Time: 25 minutes (plus 2 hours cooling)
- Yield: 16 squares 1x
Description
This creamy pumpkin fudge is an easy, homemade fall treat bursting with pumpkin spice flavor and a silky, melt-in-your-mouth texture. It’s perfect for gifting, sharing at gatherings, or enjoying as a cozy dessert all season long.
Ingredients
- 2 cups granulated sugar
- 1 cup packed brown sugar (light or dark)
- 3/4 cup unsalted butter, softened
- 2/3 cup evaporated milk
- 1/2 cup pumpkin puree (not pumpkin pie filling)
- 2 tbsp light corn syrup
- 1 1/2 tsp ground cinnamon
- 1/2 tsp ground nutmeg
- 1/4 tsp ground cloves
- 1/4 tsp ground ginger
- 1/8 tsp salt
- 1 tsp vanilla extract
- 2 cups white chocolate chips (or chopped white chocolate)
- 1 cup mini marshmallows
- Optional: Chopped pecans or walnuts
- Optional: Extra cinnamon sugar sprinkle
- Optional: Drizzle of melted chocolate
Instructions
- Line an 8×8-inch square baking pan with parchment paper, leaving an overhang for easy lifting. Lightly butter the parchment.
- In a medium saucepan, combine granulated sugar, brown sugar, unsalted butter, evaporated milk, pumpkin puree, corn syrup, cinnamon, nutmeg, cloves, ginger, and salt. Whisk to blend.
- Place saucepan over medium heat. Stir constantly for 4-5 minutes until butter melts and mixture is smooth.
- Bring mixture to a gentle boil, stirring often. Boil for 7-8 minutes, stirring constantly, until slightly thickened.
- Remove from heat. Immediately add white chocolate chips, marshmallows, and vanilla extract. Stir vigorously until melted and glossy.
- Quickly pour fudge into prepared pan. Smooth top with spatula.
- Add optional toppings (nuts, cinnamon sugar, chocolate drizzle) while fudge is soft.
- Cool at room temperature for at least 2 hours, or refrigerate for 45-60 minutes for firmer squares.
- Lift fudge out of pan using parchment. Slice into 16 squares with a sharp knife, wiping blade between cuts.
Notes
Measure all ingredients before starting, as fudge sets quickly. Use a heavy-bottomed pan for even heating. For dairy-free, substitute coconut oil for butter and coconut milk for evaporated milk. Fudge is naturally gluten-free. Store in an airtight container at room temperature for 3 days, refrigerate for up to a week, or freeze for up to 2 months. For best texture, serve chilled or at cool room temperature.
- Prep Time: 10 minutes
- Cook Time: 15 minutes
- Category: Dessert
- Cuisine: American
Nutrition
- Serving Size: 1 square (1/16 of batch)
- Calories: 170
- Sugar: 24
- Sodium: 35
- Fat: 7
- Saturated Fat: 4
- Carbohydrates: 28
- Protein: 1
Keywords: pumpkin fudge, fall dessert, easy fudge, homemade fudge, pumpkin spice, autumn treat, gluten-free dessert, holiday gift, creamy fudge, no thermometer fudge