
The burst of melted cheese, a hint of tangy tomato sauce, and that irresistible golden crust—cheesy pizza pockets are the ultimate snack for anyone who loves pizza (which, let’s face it, is most of us). I still remember the first time I whipped up these tasty cheesy pizza pockets at home: my kids gathered around the kitchen, eyes wide and mouths watering, waiting for these little guys to come out of the oven. We all ended up burning our tongues a bit because, honestly, none of us could wait for them to cool down! If you’re looking for an easy homemade snack that delivers on flavor and fun, this cheesy pizza pockets recipe ticks all the boxes.
What’s cool is you don’t need any fancy equipment or obscure ingredients—just a handful of pantry staples and a craving for something cheesy. I developed this recipe during a weekend when takeout wasn’t an option (budget woes, you know?), and it’s been a go-to for parties and after-school snacks ever since. The magic is in the blend of gooey mozzarella, savory pepperoni, and a simple tomato sauce, all wrapped in soft, pillowy dough that bakes up golden and crispy. These pizza pockets are perfect for picky eaters, busy parents, and anyone needing a quick snack that feels like a treat.
As someone who’s tested this recipe over a dozen times, I can promise you: the cheesy pizza pockets come out perfectly every time (well, unless you get distracted and forget the timer—been there, done that). Whether you’re after a kid-friendly snack or just want to indulge your own pizza cravings, this recipe brings big smiles and full bellies. Let’s get baking!
Why You’ll Love This Recipe
- Quick & Easy: You can whip up these cheesy pizza pockets in under 40 minutes, which is a lifesaver when snack attacks hit.
- Simple Ingredients: No fancy shopping trips—everything you need is likely already in your fridge or pantry.
- Perfect for Kids: These are a huge hit for lunchboxes, after-school snacks, and playdates. They’re easy for little hands to hold and eat.
- Crowd-Pleaser: Adults aren’t left out! I’ve served these at game nights and parties, and they disappear faster than you’d expect.
- Unbelievably Delicious: That classic pizza flavor in a handy pocket form—crispy outside, gooey inside, and just the right amount of sauce.
What makes this cheesy pizza pockets recipe different? I use a simple trick—brushing the dough with garlic butter before baking. It adds a cozy, savory aroma and gives the crust a lovely sheen. Plus, by blending cheeses and layering ingredients, you get consistent meltiness (no sad dry pockets here!). If you’ve tried store-bought pizza snacks and found them lacking, you’ll be amazed by how much better homemade tastes. The pockets freeze beautifully, so you can stock up for those hectic days when you need a snack that feels special.
For me, these pizza pockets are more than just food—they’re an invitation to slow down, savor, and share a moment. You close your eyes at that first cheesy bite, and honestly, it just feels like comfort. Whether you’re feeding a crowd or just treating yourself, you’ll love how effortless and satisfying these are. Ready to make snack time a little extra awesome?
Ingredients Needed
This recipe uses simple, wholesome ingredients to deliver big pizza flavor and that classic cheesy pull—without the fuss. Most items are pantry staples, and you can easily swap or adjust based on what you have. Here’s what you’ll need for cheesy pizza pockets:
- For the Dough:
- 2 cups (250g) all-purpose flour (plus extra for dusting)
- 1 teaspoon instant yeast
- 1 teaspoon sugar
- 1/2 teaspoon salt
- 3/4 cup (180ml) warm water
- 1 tablespoon olive oil (adds richness)
- For the Filling:
- 1 cup (100g) shredded mozzarella cheese (for that perfect cheese pull)
- 1/2 cup (50g) diced pepperoni (optional, use turkey pepperoni for lighter pockets)
- 1/2 cup (120ml) pizza sauce (store-bought or homemade—thick works best)
- 1/4 cup (25g) grated parmesan cheese (adds a salty punch)
- 1/4 cup (30g) diced bell peppers (adds color and crunch, optional)
- 1/4 cup (25g) chopped black olives (optional, for a classic pizza vibe)
- For the Garlic Butter:
- 2 tablespoons (28g) unsalted butter, melted
- 1/2 teaspoon garlic powder
- 1 teaspoon dried Italian herbs (or just oregano)
- Egg Wash:
- 1 large egg, beaten (for sealing and shine)
Ingredient Notes & Substitutions:
- If you’re short on time, swap the homemade dough for store-bought pizza or biscuit dough—easy and still delicious.
- For gluten-free pizza pockets, use a gluten-free flour blend (I like Bob’s Red Mill).
- Dairy-free cheese melts pretty well here if you need a vegan or lactose-free version.
- Skip the pepperoni for vegetarian pockets, or swap for cooked mushrooms or spinach.
- Pizza sauce can be swapped for marinara or even a thick tomato paste if you’re in a pinch.
I always keep shredded mozzarella and flour on hand for those spontaneous pizza pocket cravings. Honestly, you can get creative with fillings—just keep the cheese ratio high for that classic cheesy pizza pockets experience.
Equipment Needed
- Baking Sheet: Essential for baking—parchment paper helps prevent sticking.
- Mixing Bowl: For combining dough ingredients. Any sturdy bowl will do the trick.
- Rolling Pin: Helps to roll out the dough evenly. If you don’t have one, a clean glass bottle works in a pinch.
- Pastry Brush: For brushing garlic butter and egg wash. A spoon works, but a brush gives more even coverage.
- Sharp Knife or Pizza Cutter: For slicing dough and sealing edges. I’ve used a butter knife before—just press firmly.
- Measuring Cups & Spoons: For accuracy (especially with flour and yeast).
- Fork: For crimping edges and mixing.
- Clean Kitchen Towel: To cover the dough while it rests.
If you’re baking these cheesy pizza pockets often, investing in a nonstick baking sheet is worth it (less scrubbing, more snacking). My old rolling pin has survived hundreds of pizza nights, but silicone ones are easy to clean. If using a glass bottle, make sure it’s sturdy and clean—trust me, you don’t want to risk breakage mid-roll!
Maintenance tip: Keep your pastry brush dry after washing (they get mildewy fast if left damp). And for budget-friendly options, thrift stores are gold mines for basic kitchen tools.
Preparation Method
- Prepare the Dough:
- In a mixing bowl, combine 2 cups (250g) flour, 1 teaspoon instant yeast, 1 teaspoon sugar, and 1/2 teaspoon salt.
- Add 3/4 cup (180ml) warm water and 1 tablespoon olive oil. Mix until a rough dough forms.
- Knead by hand on a floured surface for 5-7 minutes, until smooth and slightly springy. The dough should be soft, not sticky (add extra flour if needed).
- Cover with a kitchen towel and let rest for 15 minutes. This helps relax the gluten for easier rolling.
- Prepare the Filling:
- In a bowl, mix together 1 cup (100g) shredded mozzarella, 1/2 cup (50g) diced pepperoni, 1/4 cup (25g) parmesan, and any optional veggies (bell peppers, olives).
- Set aside your pizza sauce—having it ready makes assembly smooth.
- Shape the Dough:
- Preheat your oven to 400°F (200°C). Line a baking sheet with parchment.
- Divide dough into 8 equal balls (about 55g each for even pockets).
- Roll each ball into a circle, roughly 4-5 inches (10-12 cm) wide. If dough shrinks back, let it rest another 5 minutes.
- Fill the Pizza Pockets:
- Spread 1 tablespoon pizza sauce in the center of each dough round.
- Add a generous spoonful of cheese mixture (about 2 tablespoons), making sure not to overfill (otherwise pockets won’t seal).
- If desired, sprinkle a little extra parmesan or herbs on top.
- Seal the Edges:
- Fold dough over filling to create a half-moon shape. Press edges together firmly.
- Use a fork to crimp and seal (press hard—if they open during baking, cheese will leak out).
- Brush edges lightly with beaten egg for extra seal and shine.
- Garlic Butter Topping:
- Mix melted butter, garlic powder, and herbs.
- Brush tops of pockets lightly before baking.
- Bake:
- Place pockets on prepared baking sheet, spaced at least 1 inch (2.5 cm) apart.
- Bake for 18-22 minutes, until golden brown and bubbly.
- Rotate the pan halfway for even baking.
- Cool and Serve:
- Let pockets cool for 5 minutes—cheese will be lava-hot!
- Enjoy warm for maximum cheese pull.
Troubleshooting: If pockets split open, the dough may have been too thin or overfilled. If bottoms are pale, bake an extra 2-3 minutes. For extra crispiness, finish under the broiler for 1 minute (watch closely!). Sensory cue: The pockets should smell garlicky and cheesy with a faint hint of toasted flour.
Efficiency tip: Prep filling while dough rests, and use an assembly line for filling and sealing. I sometimes freeze half the pockets unbaked for future snack emergencies!
Cooking Tips & Techniques
Let’s talk real kitchen know-how. After a few failed batches (think cheese leaks and dough explosions), I picked up some tricks for perfect cheesy pizza pockets:
- Don’t Overfill: It’s tempting, but too much cheese or sauce means leaks. Stick to the recommended amounts for neat pockets.
- Seal Well: Crimping with a fork works best. If edges come undone, you’ll get messy (but still tasty) pockets.
- Chill the Filling: If you have time, chill the cheese mixture for 10 minutes. It helps keep everything inside during baking.
- Watch the Oven: Ovens vary! Rotate your pan halfway through for even browning. My old oven runs hot, so I set a timer for 15 minutes and check early.
- Use Parchment Paper: This prevents sticking and makes clean-up a breeze. If you skip it, be ready for some scrubbing.
- Shiny Crusts: That egg wash isn’t just for looks—it helps seal and gives a bakery-style finish.
- Multitasking: Prep filling while dough rests, and have your baking sheet ready to go. Assembly goes fast once you get the rhythm.
- Consistent Size: Weigh dough balls if you want all pockets to bake evenly. Otherwise, some might cook faster than others.
Common mistakes? Too thin dough leads to breakage. Too thick dough means a bready pocket. Aim for 1/8-inch thickness. I once forgot the garlic butter step and the result was still good, but that extra flavor really makes a difference. Don’t skip it!
Your pizza pockets might look rustic—embrace it! That homemade look means more flavor and more fun.
Variations & Adaptations
This cheesy pizza pockets recipe is super flexible. Here are some fun ways to switch things up:
- Gluten-Free: Use a 1:1 gluten-free flour blend. The texture will be slightly different, but still delicious (my friend with celiac swears by it).
- Veggie Lovers: Add sautéed mushrooms, spinach, or zucchini instead of pepperoni. Roasted veggies work great too.
- Spicy Kick: Toss in sliced jalapeños or a sprinkle of crushed red pepper for a fiery twist.
- Seasonal Swap: In summer, add chopped fresh basil and cherry tomatoes. In winter, try caramelized onions and cooked sausage.
- Dairy-Free: Use vegan cheese shreds and olive oil instead of butter. The pockets still crisp up beautifully.
- Cooking Methods: Air fryer fans—cook pockets at 375°F (190°C) for 12-15 minutes for extra crunch.
Allergen tip: For egg-free, seal edges with a little water instead of egg wash. I’ve made pizza pockets with leftover cooked chicken, roasted garlic, and even pineapple (don’t judge—it was surprisingly good!).
My favorite personal twist? Adding a hint of smoked paprika to the garlic butter. It gives the crust a subtle, smoky flavor. Feel free to get creative—these pockets are your canvas!
Serving & Storage Suggestions
Serve cheesy pizza pockets warm for the best experience—the cheese is gooey, the crust is crisp, and the aroma is pure comfort. I love stacking them on a wooden board with a bowl of extra pizza sauce for dipping. For a fun party platter, mix regular and veggie-filled pockets so everyone finds their favorite.
Pair with a simple green salad or crunchy veggie sticks for balance. They also go perfectly with lemonade or sparkling water. If you want to turn snack time into dinner, add a side of roasted potatoes or fruit salad.
Storage: Let pockets cool completely, then pack in an airtight container. Refrigerate for up to 3 days—they reheat beautifully. For longer storage, freeze unbaked pockets on a tray, then transfer to a zip-top bag. Bake straight from frozen at 400°F (200°C) for 20-25 minutes.
Reheating: Warm in a 350°F (175°C) oven for 8-10 minutes, or microwave for 30 seconds (but the crust won’t be as crisp). Flavors actually deepen after a day—the sauce and cheese meld for extra yum.
Nutritional Information & Benefits
Each cheesy pizza pocket clocks in at roughly 180-220 calories, depending on fillings. You’ll get about 8g protein, 10g fat, and 20g carbs per pocket—pretty balanced for a snack. Mozzarella and parmesan deliver calcium for strong bones, while the tomato sauce offers vitamin C and lycopene.
For gluten-free or dairy-free adaptations, the nutrition will shift a bit (less protein, more fiber if using veggies). Watch out for pepperoni if you’re sensitive to sodium—swap for turkey or skip altogether.
I love that these pizza pockets are satisfying but not heavy. You can adjust cheese and fillings for lower fat, or bulk up veggie content for extra vitamins. For me, they’re the perfect treat after a busy day—just enough indulgence without the guilt.
Conclusion
Cheesy pizza pockets are more than just an easy snack—they’re a little slice of happiness you can hold in your hand. They bring together everything we love about pizza, but in a fun, portable shape that’s perfect for kids, parties, or solo snacking. This recipe is simple enough for beginners, but tasty enough to impress everyone at the table.
Don’t be afraid to put your own spin on these pockets—swap fillings, play with spices, and make them your own. I make these whenever my family needs a pick-me-up or when friends drop by unexpectedly. Trust me, one batch is never enough!
If you try this cheesy pizza pockets recipe, let me know how it goes! Drop a comment, share your favorite variation, or tag me on social media with your creations. Happy snacking—may your pockets always be filled with cheese!
FAQs
Can I make cheesy pizza pockets ahead of time?
Yes! Assemble and freeze unbaked pockets, then bake straight from frozen when needed. They also keep in the fridge for up to 3 days after baking.
Do I have to use homemade dough?
Nope. Store-bought pizza or biscuit dough works great for a shortcut. Just roll it out and proceed with the recipe.
What cheese is best for pizza pockets?
Mozzarella for meltiness, plus a little parmesan for flavor. Feel free to add cheddar or a mix of your favorite cheeses.
Can I make these vegetarian or vegan?
Absolutely. Skip the pepperoni, add veggies, and use dairy-free cheese and butter for vegan pockets.
How do I prevent the filling from leaking?
Don’t overfill, seal edges well with a fork, and brush with egg wash for extra hold. Chilling the filling before baking also helps.
Pin This Recipe!


Cheesy Pizza Pockets
- Total Time: 40 minutes
- Yield: 8 pockets 1x
Description
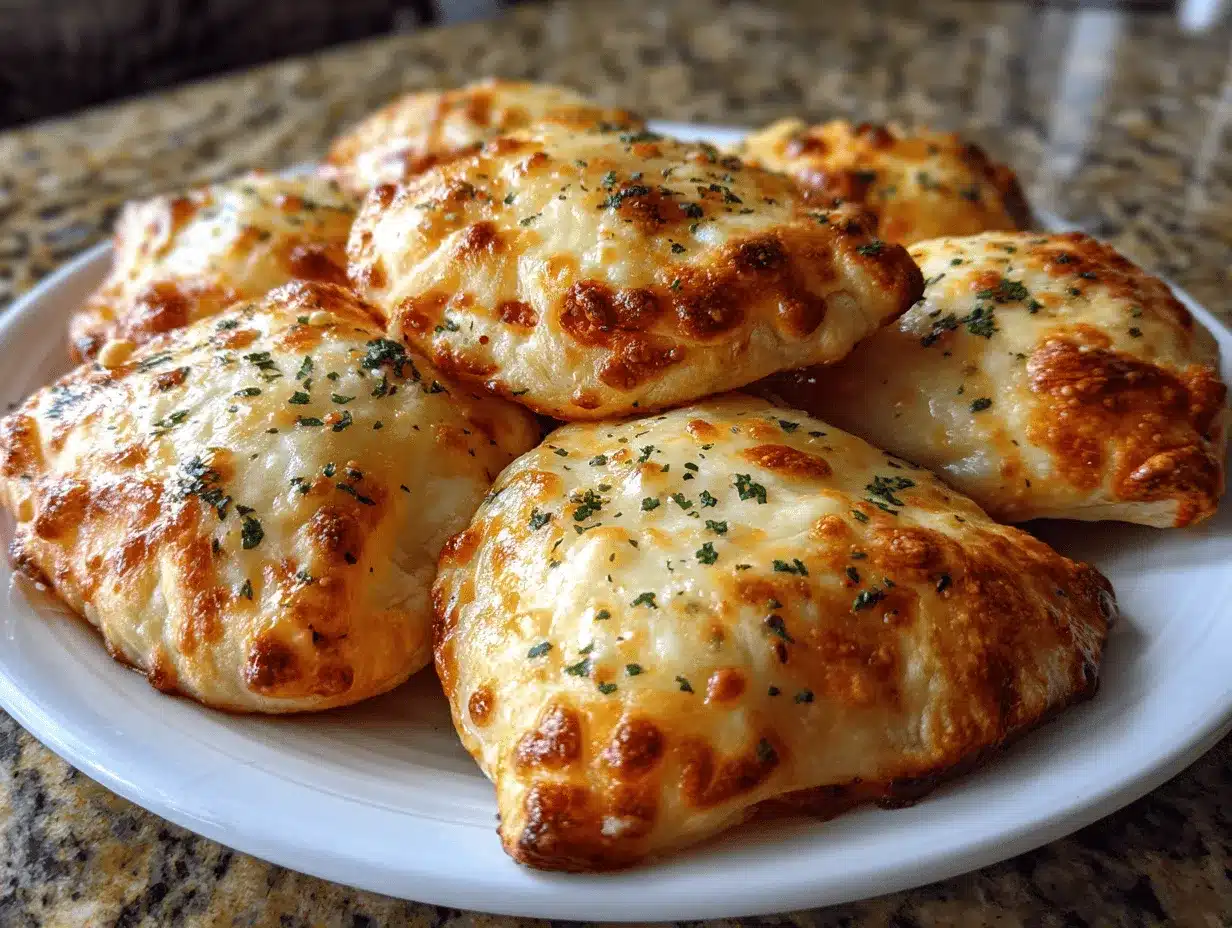
Cheesy pizza pockets are a kid-friendly, homemade snack featuring gooey mozzarella, savory pepperoni, and tangy tomato sauce wrapped in golden, pillowy dough. Perfect for parties, lunchboxes, or anytime you crave classic pizza flavor in a fun, portable form.
Ingredients
- 2 cups all-purpose flour (plus extra for dusting)
- 1 teaspoon instant yeast
- 1 teaspoon sugar
- 1/2 teaspoon salt
- 3/4 cup warm water
- 1 tablespoon olive oil
- 1 cup shredded mozzarella cheese
- 1/2 cup diced pepperoni (optional)
- 1/2 cup pizza sauce
- 1/4 cup grated parmesan cheese
- 1/4 cup diced bell peppers (optional)
- 1/4 cup chopped black olives (optional)
- 2 tablespoons unsalted butter, melted
- 1/2 teaspoon garlic powder
- 1 teaspoon dried Italian herbs or oregano
- 1 large egg, beaten
Instructions
- In a mixing bowl, combine flour, instant yeast, sugar, and salt.
- Add warm water and olive oil. Mix until a rough dough forms.
- Knead by hand on a floured surface for 5-7 minutes until smooth and slightly springy. Add extra flour if needed.
- Cover with a kitchen towel and let rest for 15 minutes.
- In a bowl, mix together mozzarella, pepperoni, parmesan, and any optional veggies. Set aside pizza sauce.
- Preheat oven to 400°F (200°C). Line a baking sheet with parchment paper.
- Divide dough into 8 equal balls. Roll each ball into a 4-5 inch circle.
- Spread 1 tablespoon pizza sauce in the center of each dough round.
- Add about 2 tablespoons of cheese mixture to each, without overfilling.
- Fold dough over filling to create a half-moon shape. Press edges together firmly.
- Crimp edges with a fork and brush with beaten egg.
- Mix melted butter, garlic powder, and herbs. Brush tops of pockets lightly.
- Place pockets on baking sheet, spaced 1 inch apart.
- Bake for 18-22 minutes until golden brown and bubbly, rotating pan halfway.
- Let pockets cool for 5 minutes before serving.
Notes
For gluten-free pockets, use a 1:1 gluten-free flour blend. For vegan, use dairy-free cheese and butter, and seal edges with water instead of egg wash. Do not overfill pockets to prevent leaks. Freeze unbaked pockets for future snacks. Chill filling for 10 minutes before assembling for less leakage.
- Prep Time: 20 minutes
- Cook Time: 20 minutes
- Category: Snack
- Cuisine: American
Nutrition
- Serving Size: 1 pizza pocket
- Calories: 200
- Sugar: 2
- Sodium: 400
- Fat: 10
- Saturated Fat: 5
- Carbohydrates: 20
- Fiber: 1
- Protein: 8
Keywords: pizza pockets, cheesy snack, kid-friendly, homemade pizza, easy snack, party food, lunchbox, mozzarella, pepperoni, quick recipe